Making a client’s wish come to life! (behind the scenes)

If you tried to get in touch with the team over the last quarter of 2021, you might have had a tough time as we were all a little busy….
Over the course of a few months we delivered one of our most complicated builds for some time. It would be large, detailed and for a client a very long way away. In fact, we’d never meet or even talk to the client. This is the story of how we built Paimon, from the game Genshin Impact.
Image - a 3D render of the brick model
The brief
Earlier in the year, we we contacted by a customer to create a 'huge brick-built model’ of a character from the game, Genshin Impact. Never one to refuse a challenge we started thinking about how it should be built. There were of course, a few things to take into account.
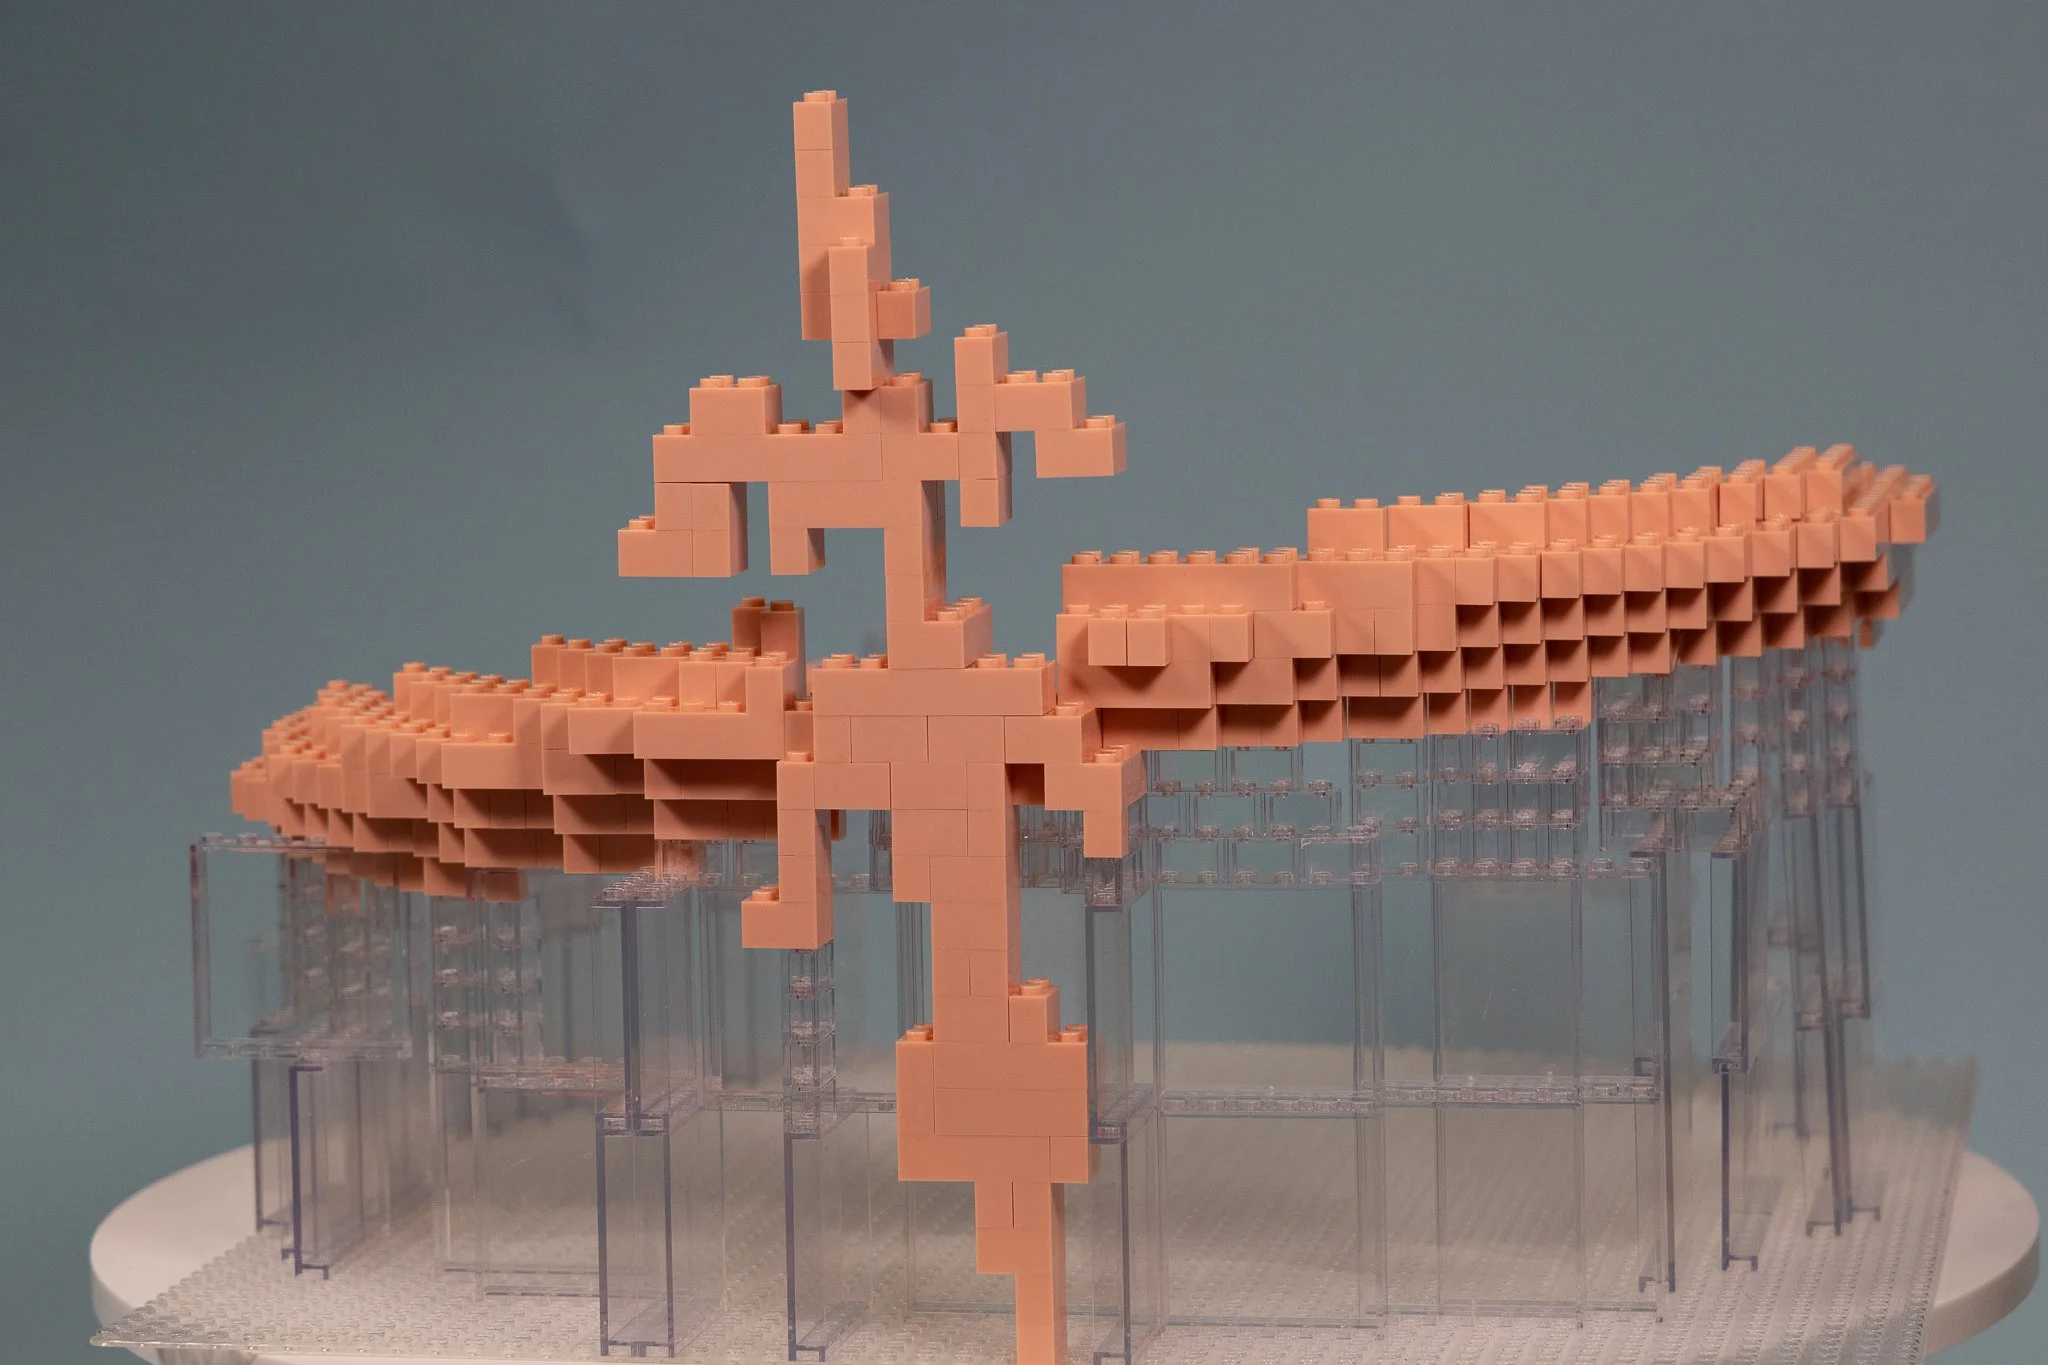
Firstly, the character doesn’t stand on the floor. They float! So we’d have to design some way of supporting the build.
They really weren’t kidding about large - initially we were asked to build it at 3 metres (12ft) tall. Though as we’ll see later on, 2 metres would be much more realistic!
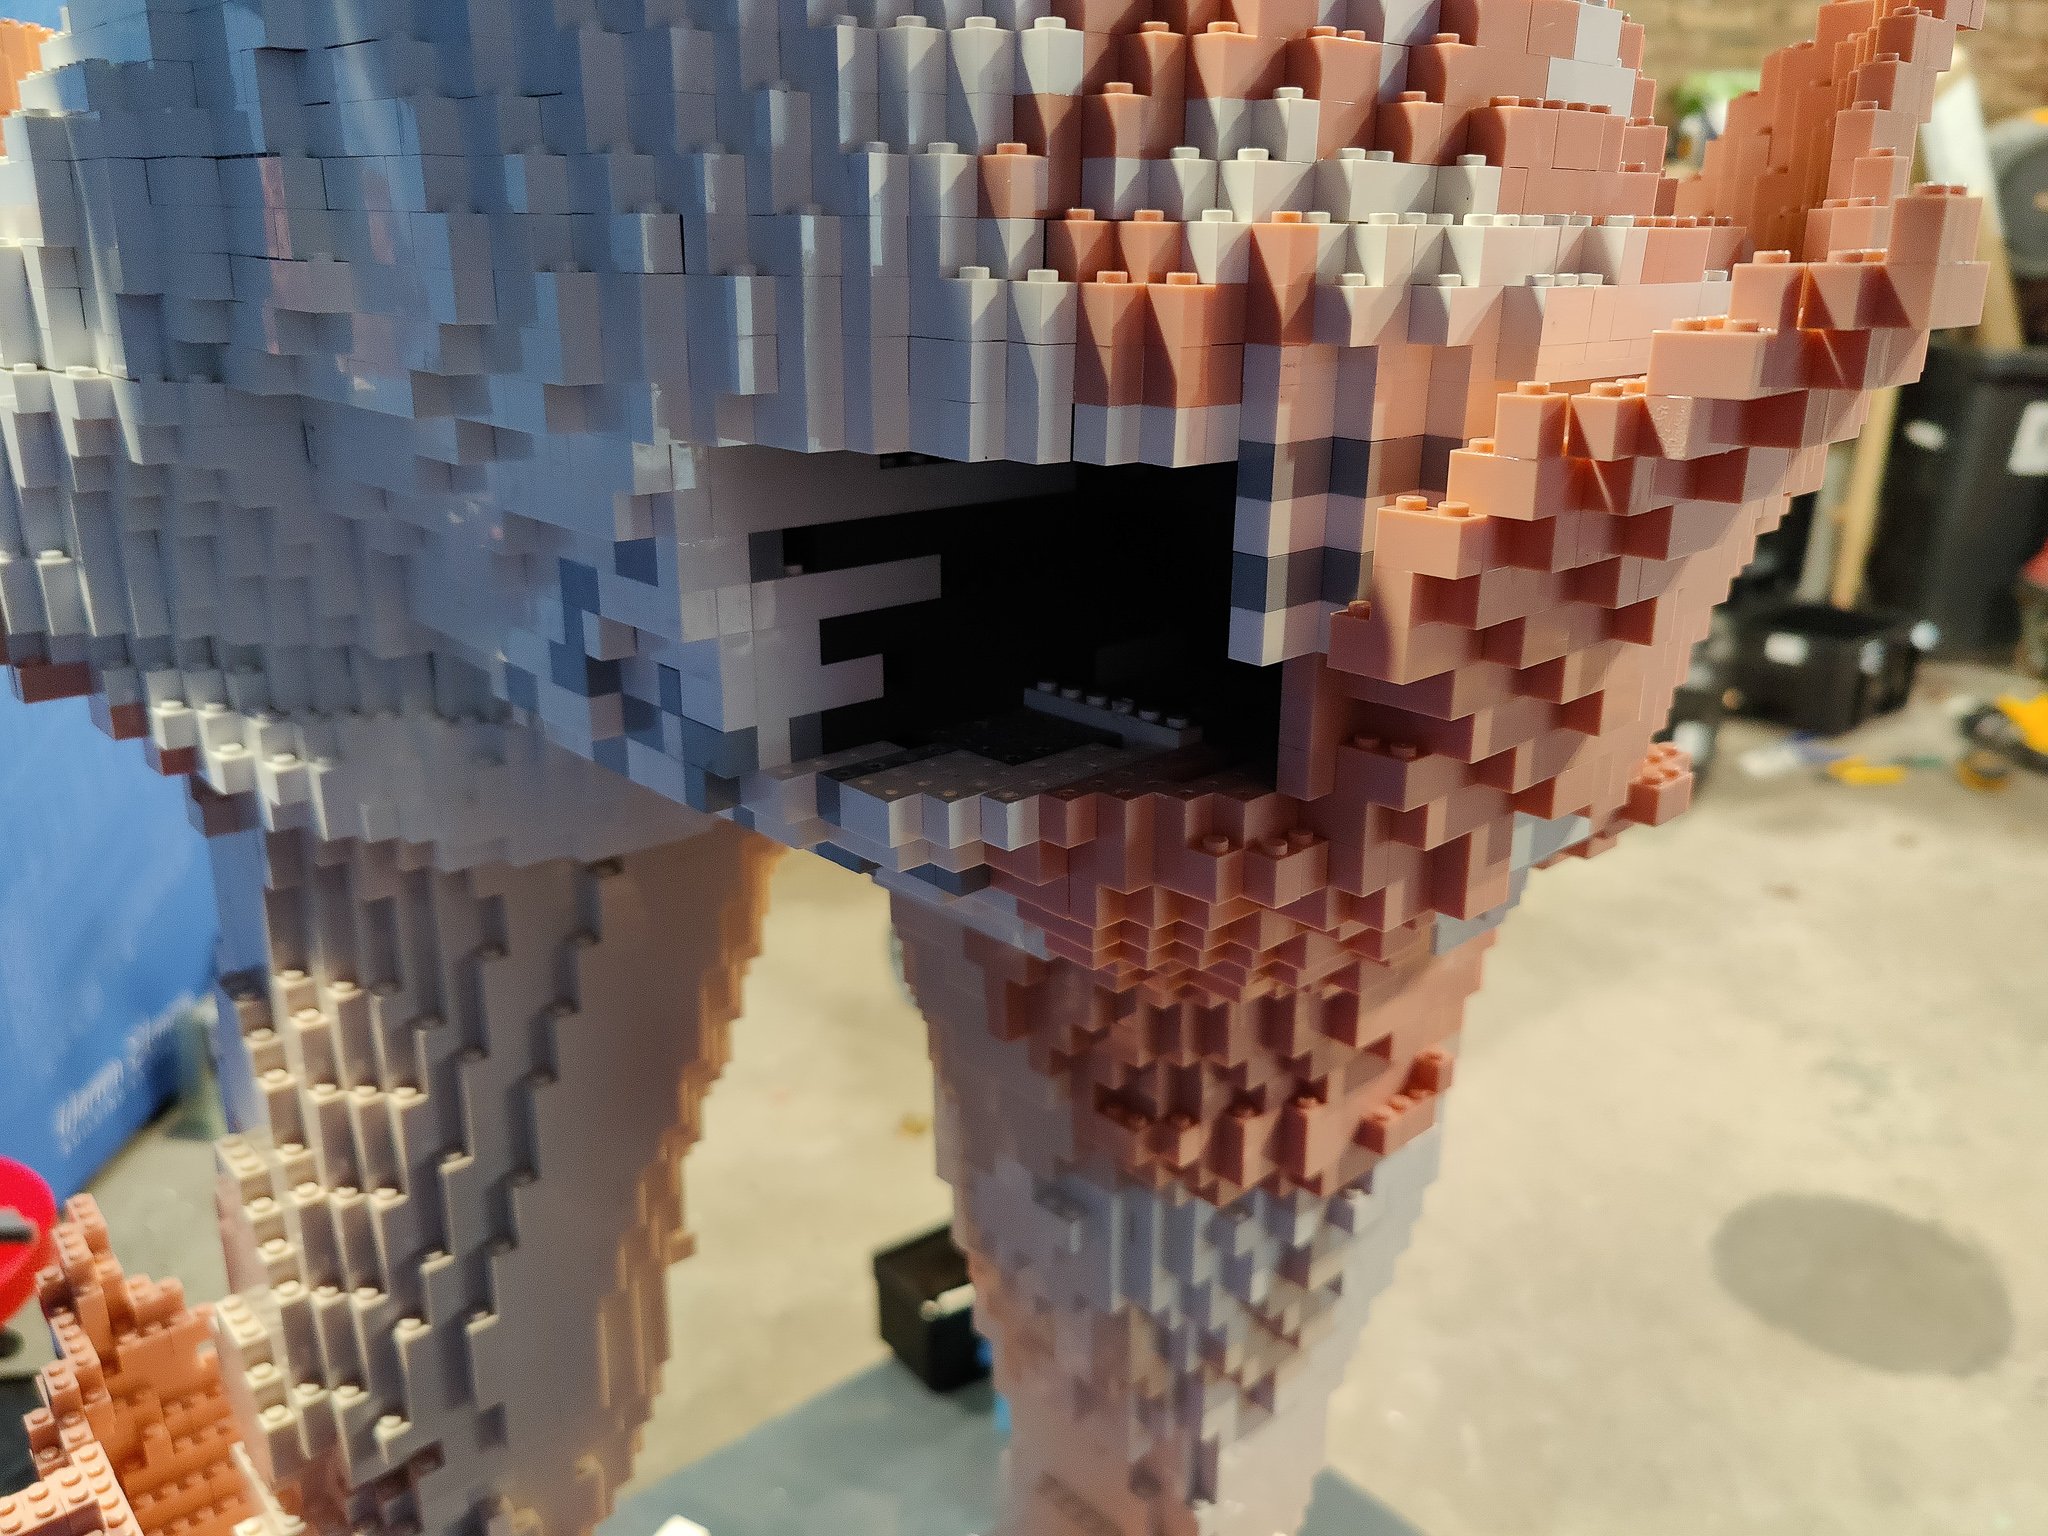
Secondly, being a game character, they’re not 100% lifelike. We’d have very small ankles and wrists to deal with - along with a large cloak and a hovering crown.
Next up, the colours. We had to stick to the IP (intellectual property) as closely as possible. So the colours must match.
The model would need delivering to our customer and installing. No problem there, it was destined for Paris. Well, no problem until the delivery address changed to South Korea!
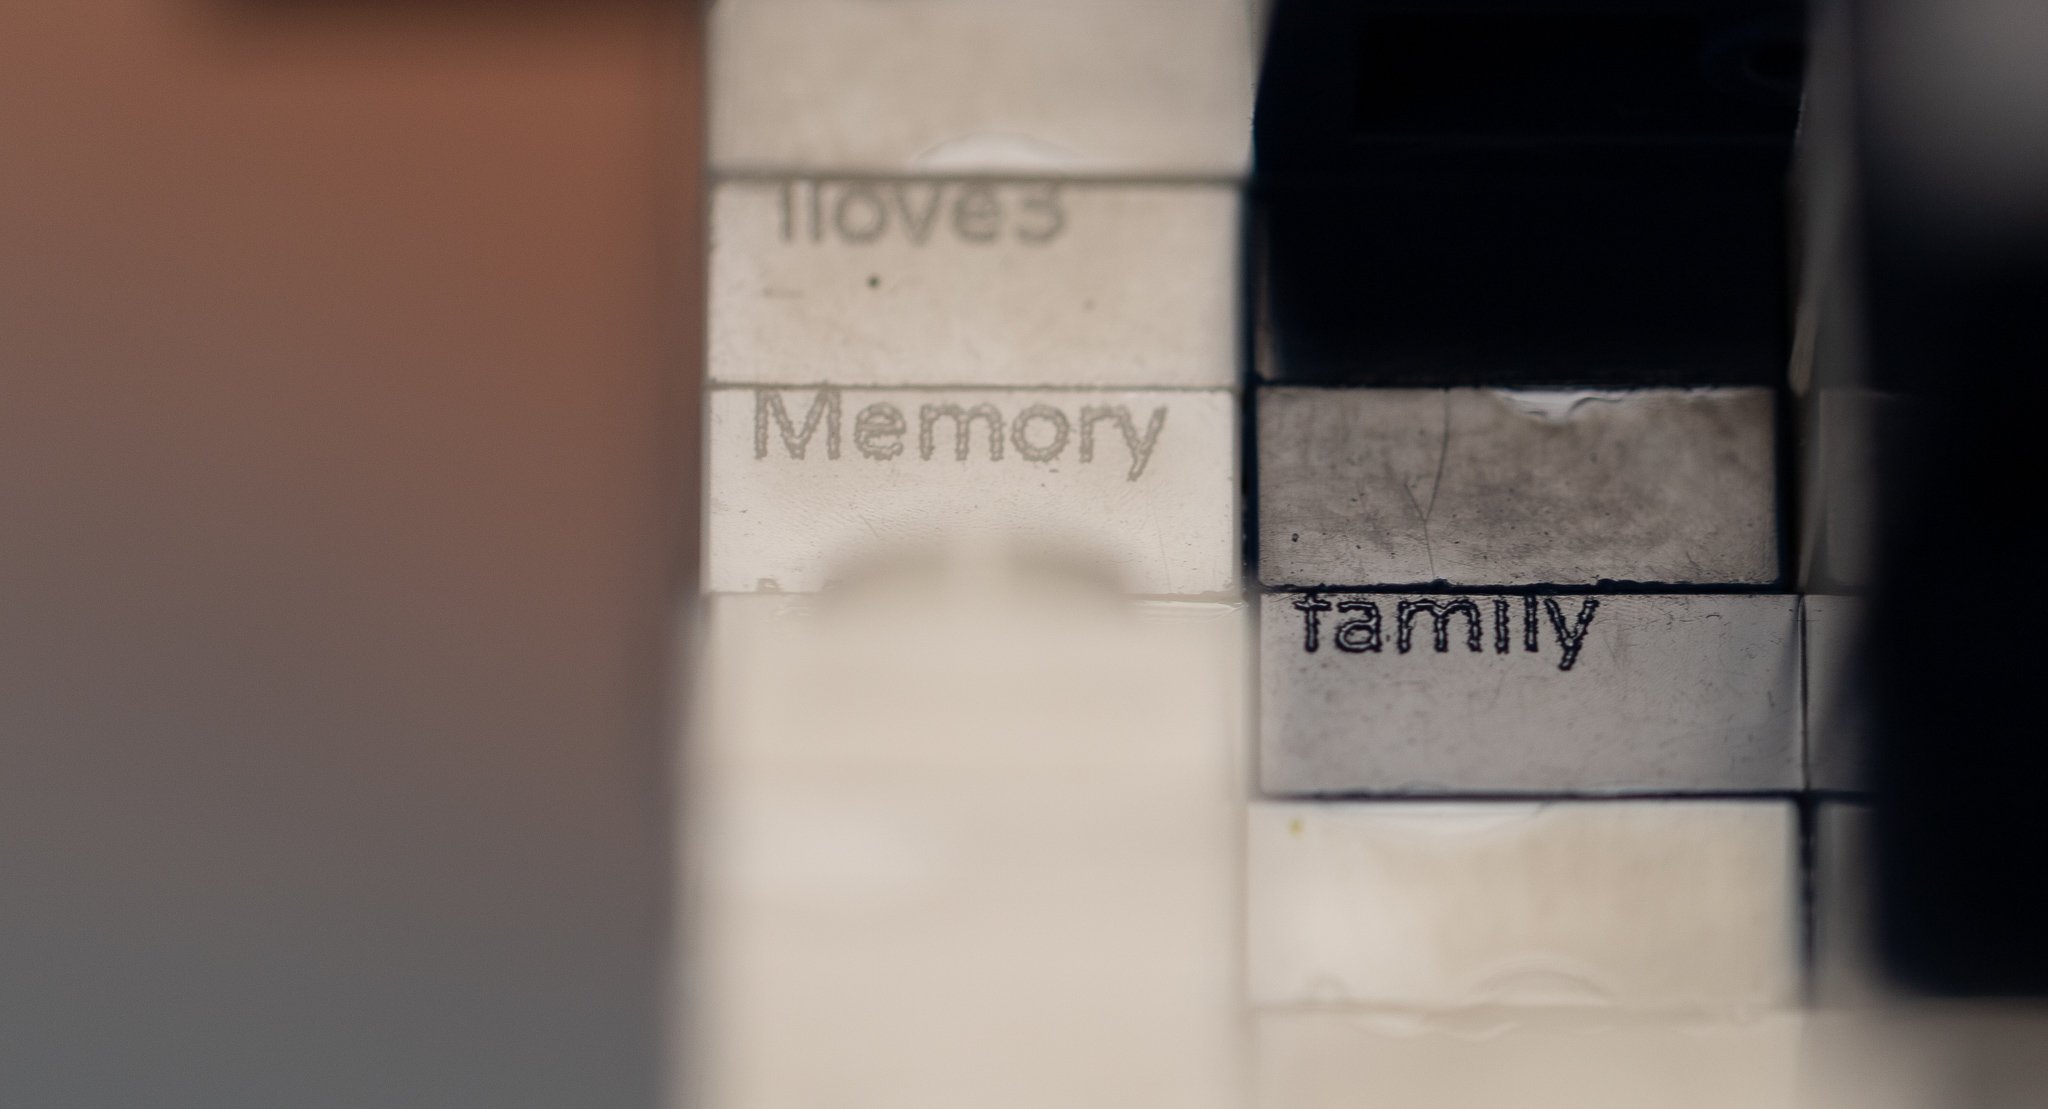
Finally, just a small detail. Each brick would be sponsored by a player. So we needed to mark every brick. EVERY. SINGLE. BRICK.
I said we like a challenge, didn’t I?
Outline Design

Needless to say, agreeing the design took some time. Thankfully in this instance, we were able to obtain the original 3D model used to create the character. That would drop our design time significantly.
Using some software that we’ve had developed just for this type of project, we could convert the 3D model into a mesh of 1x1 LEGO bricks. This doesn’t tell us how to build it as of course we can’t just make the model out of 1x1 bricks (they’d fall apart!). It does give us the outline shell though, which at least means we have a starting point. With the outline shell complete - it was time to talk to a structural engineer.
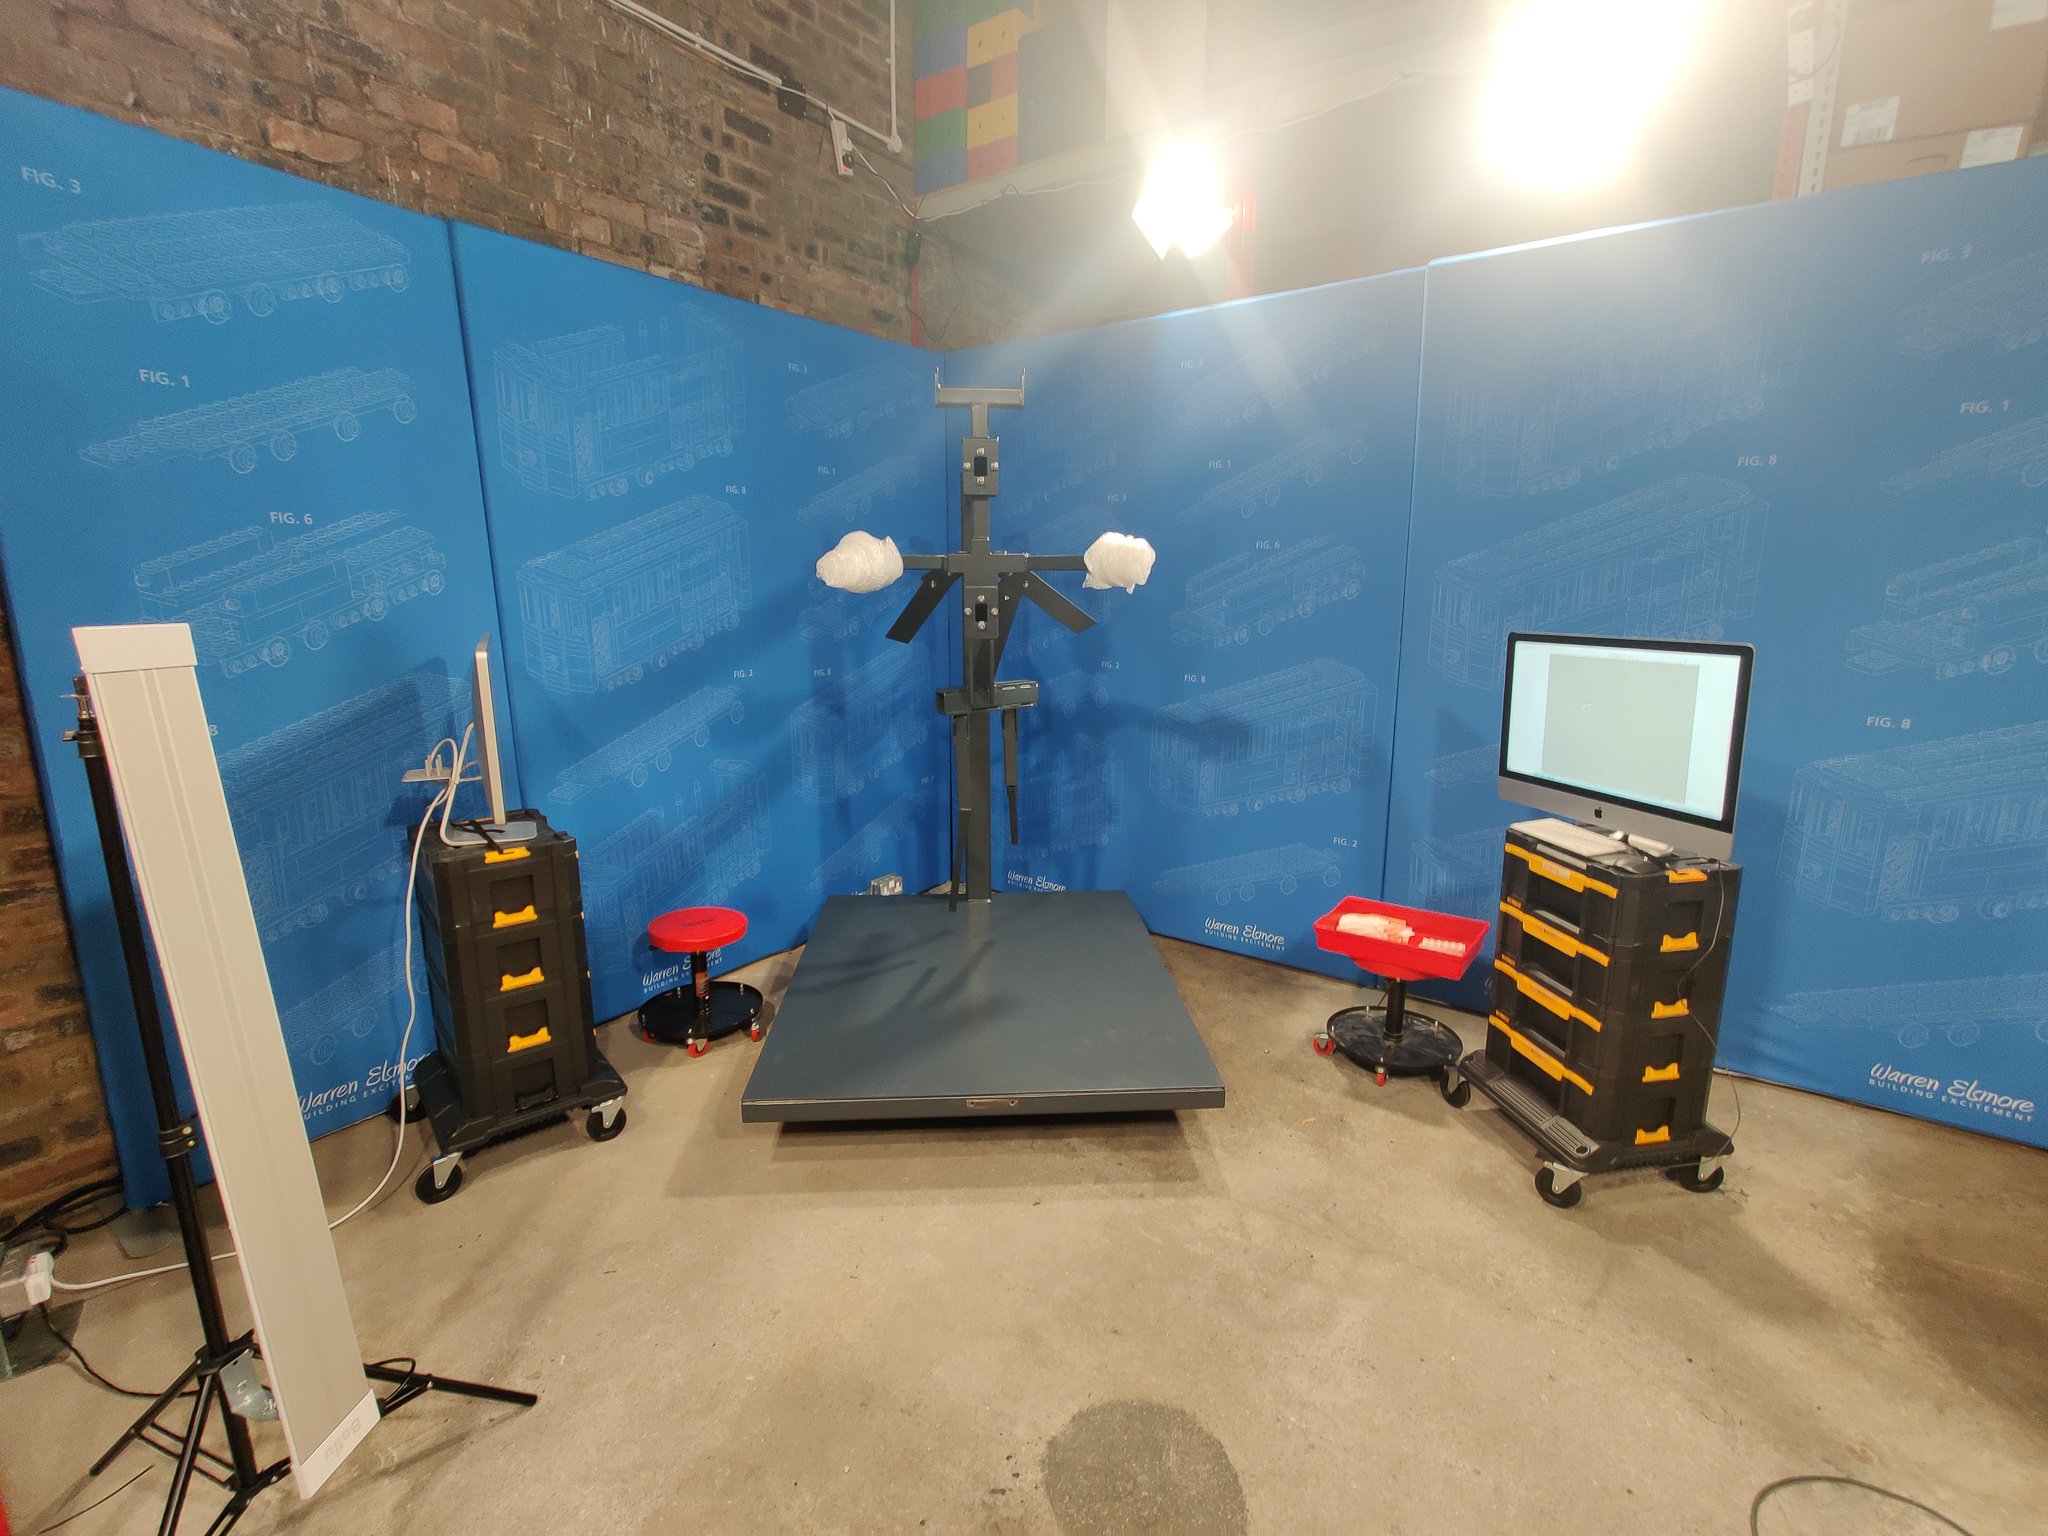
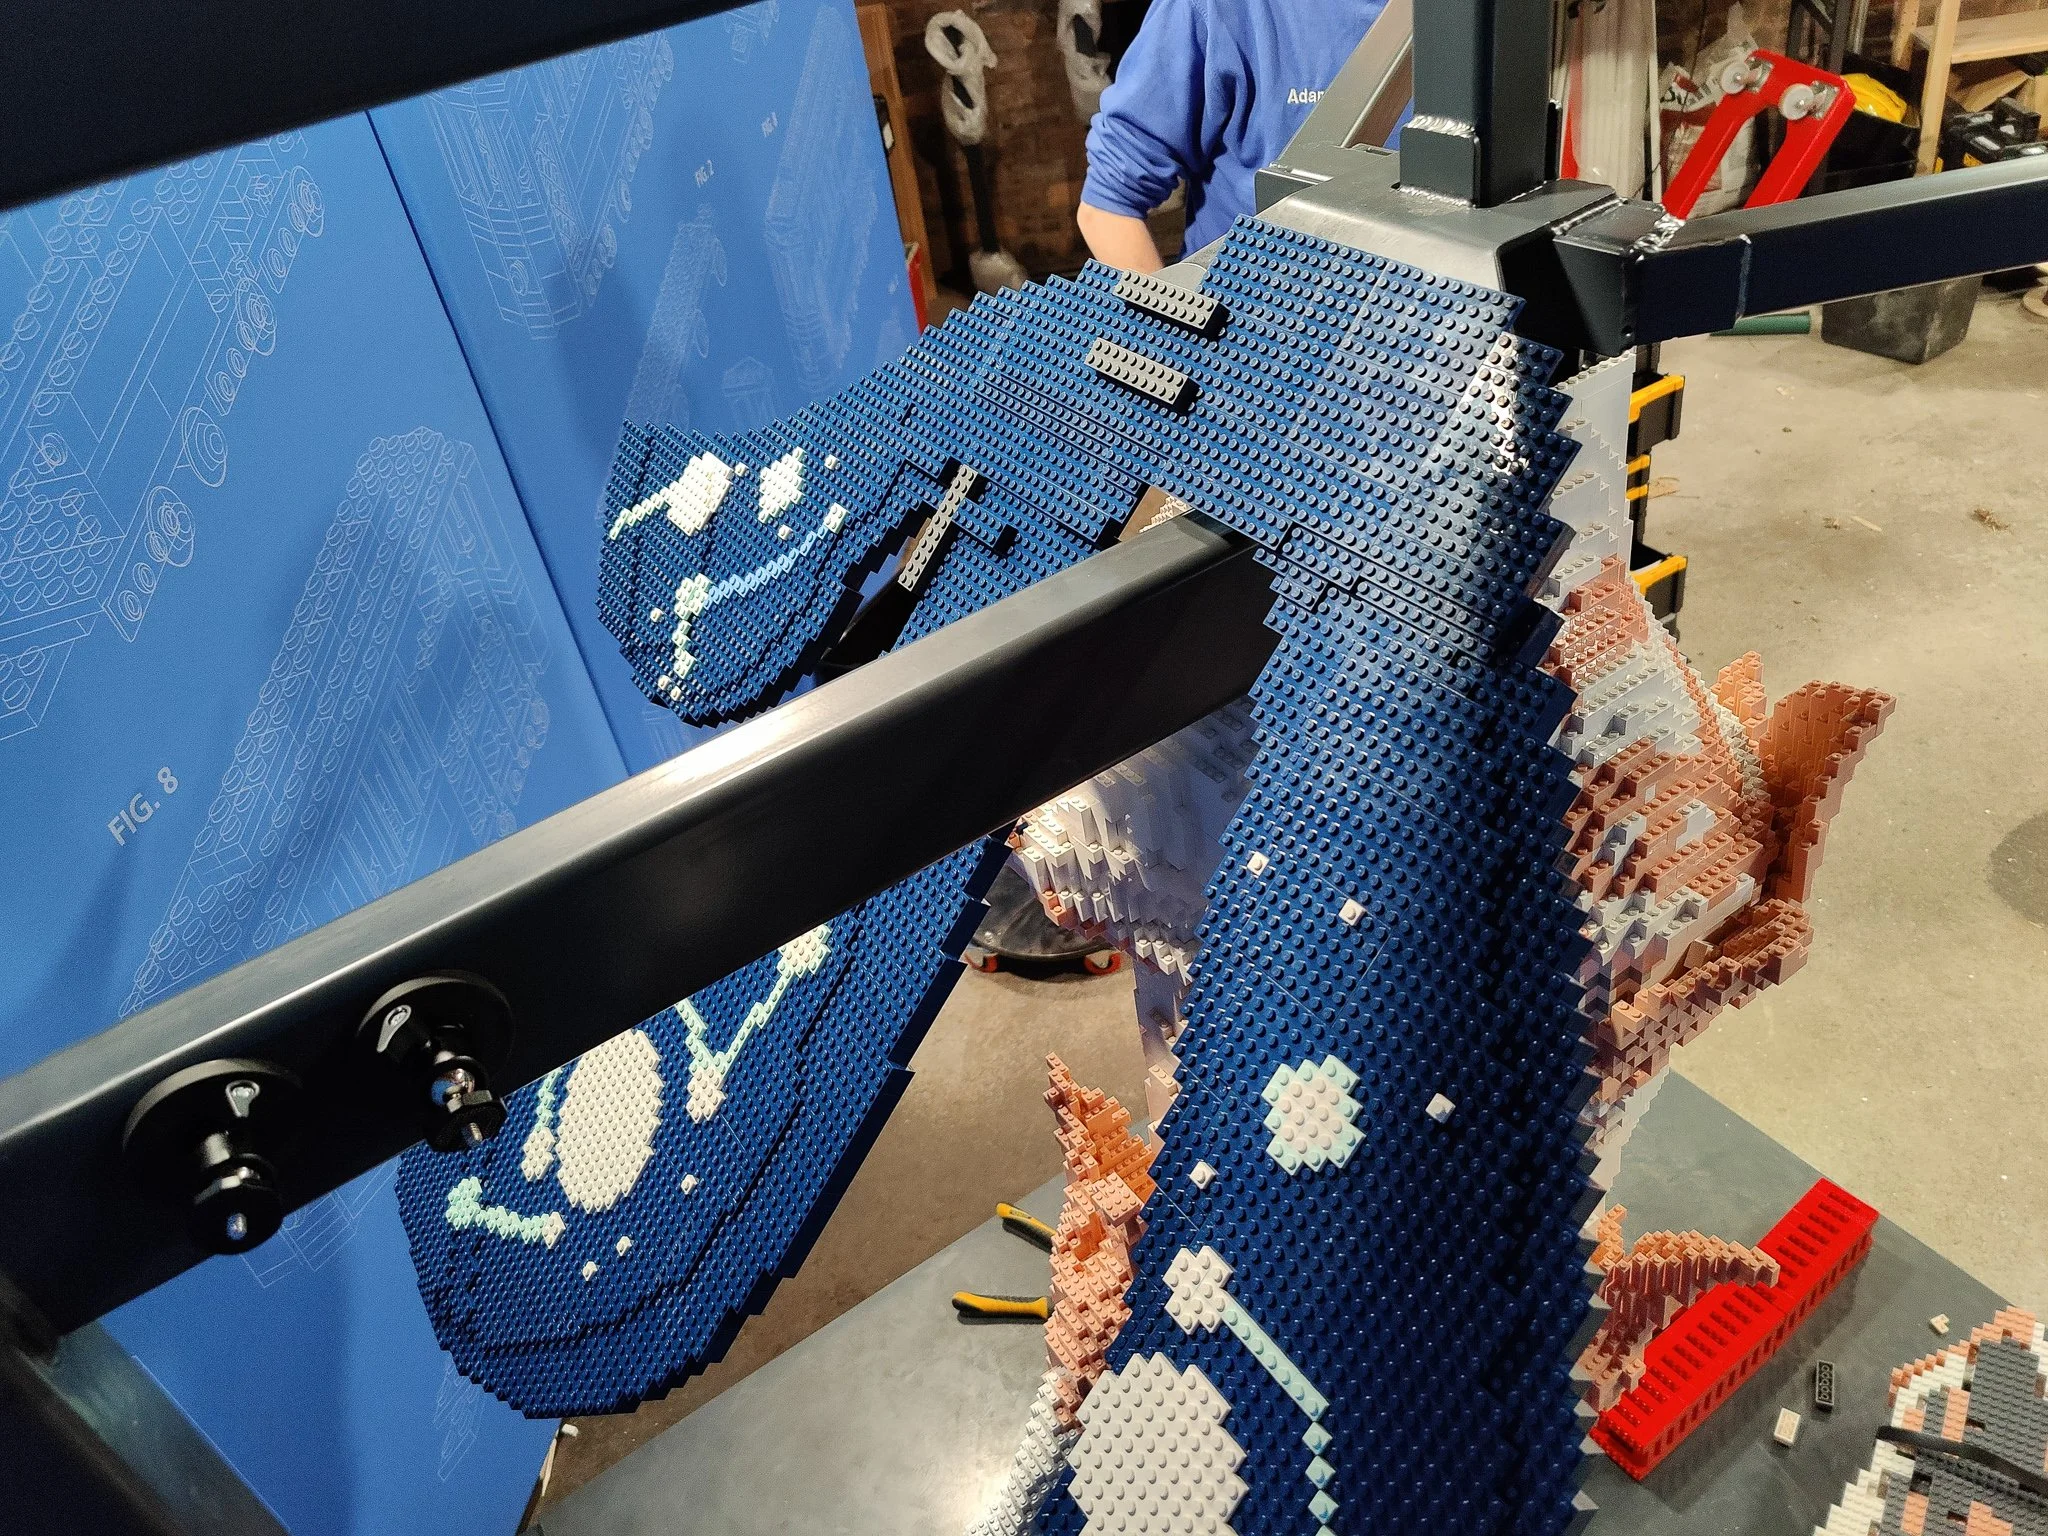
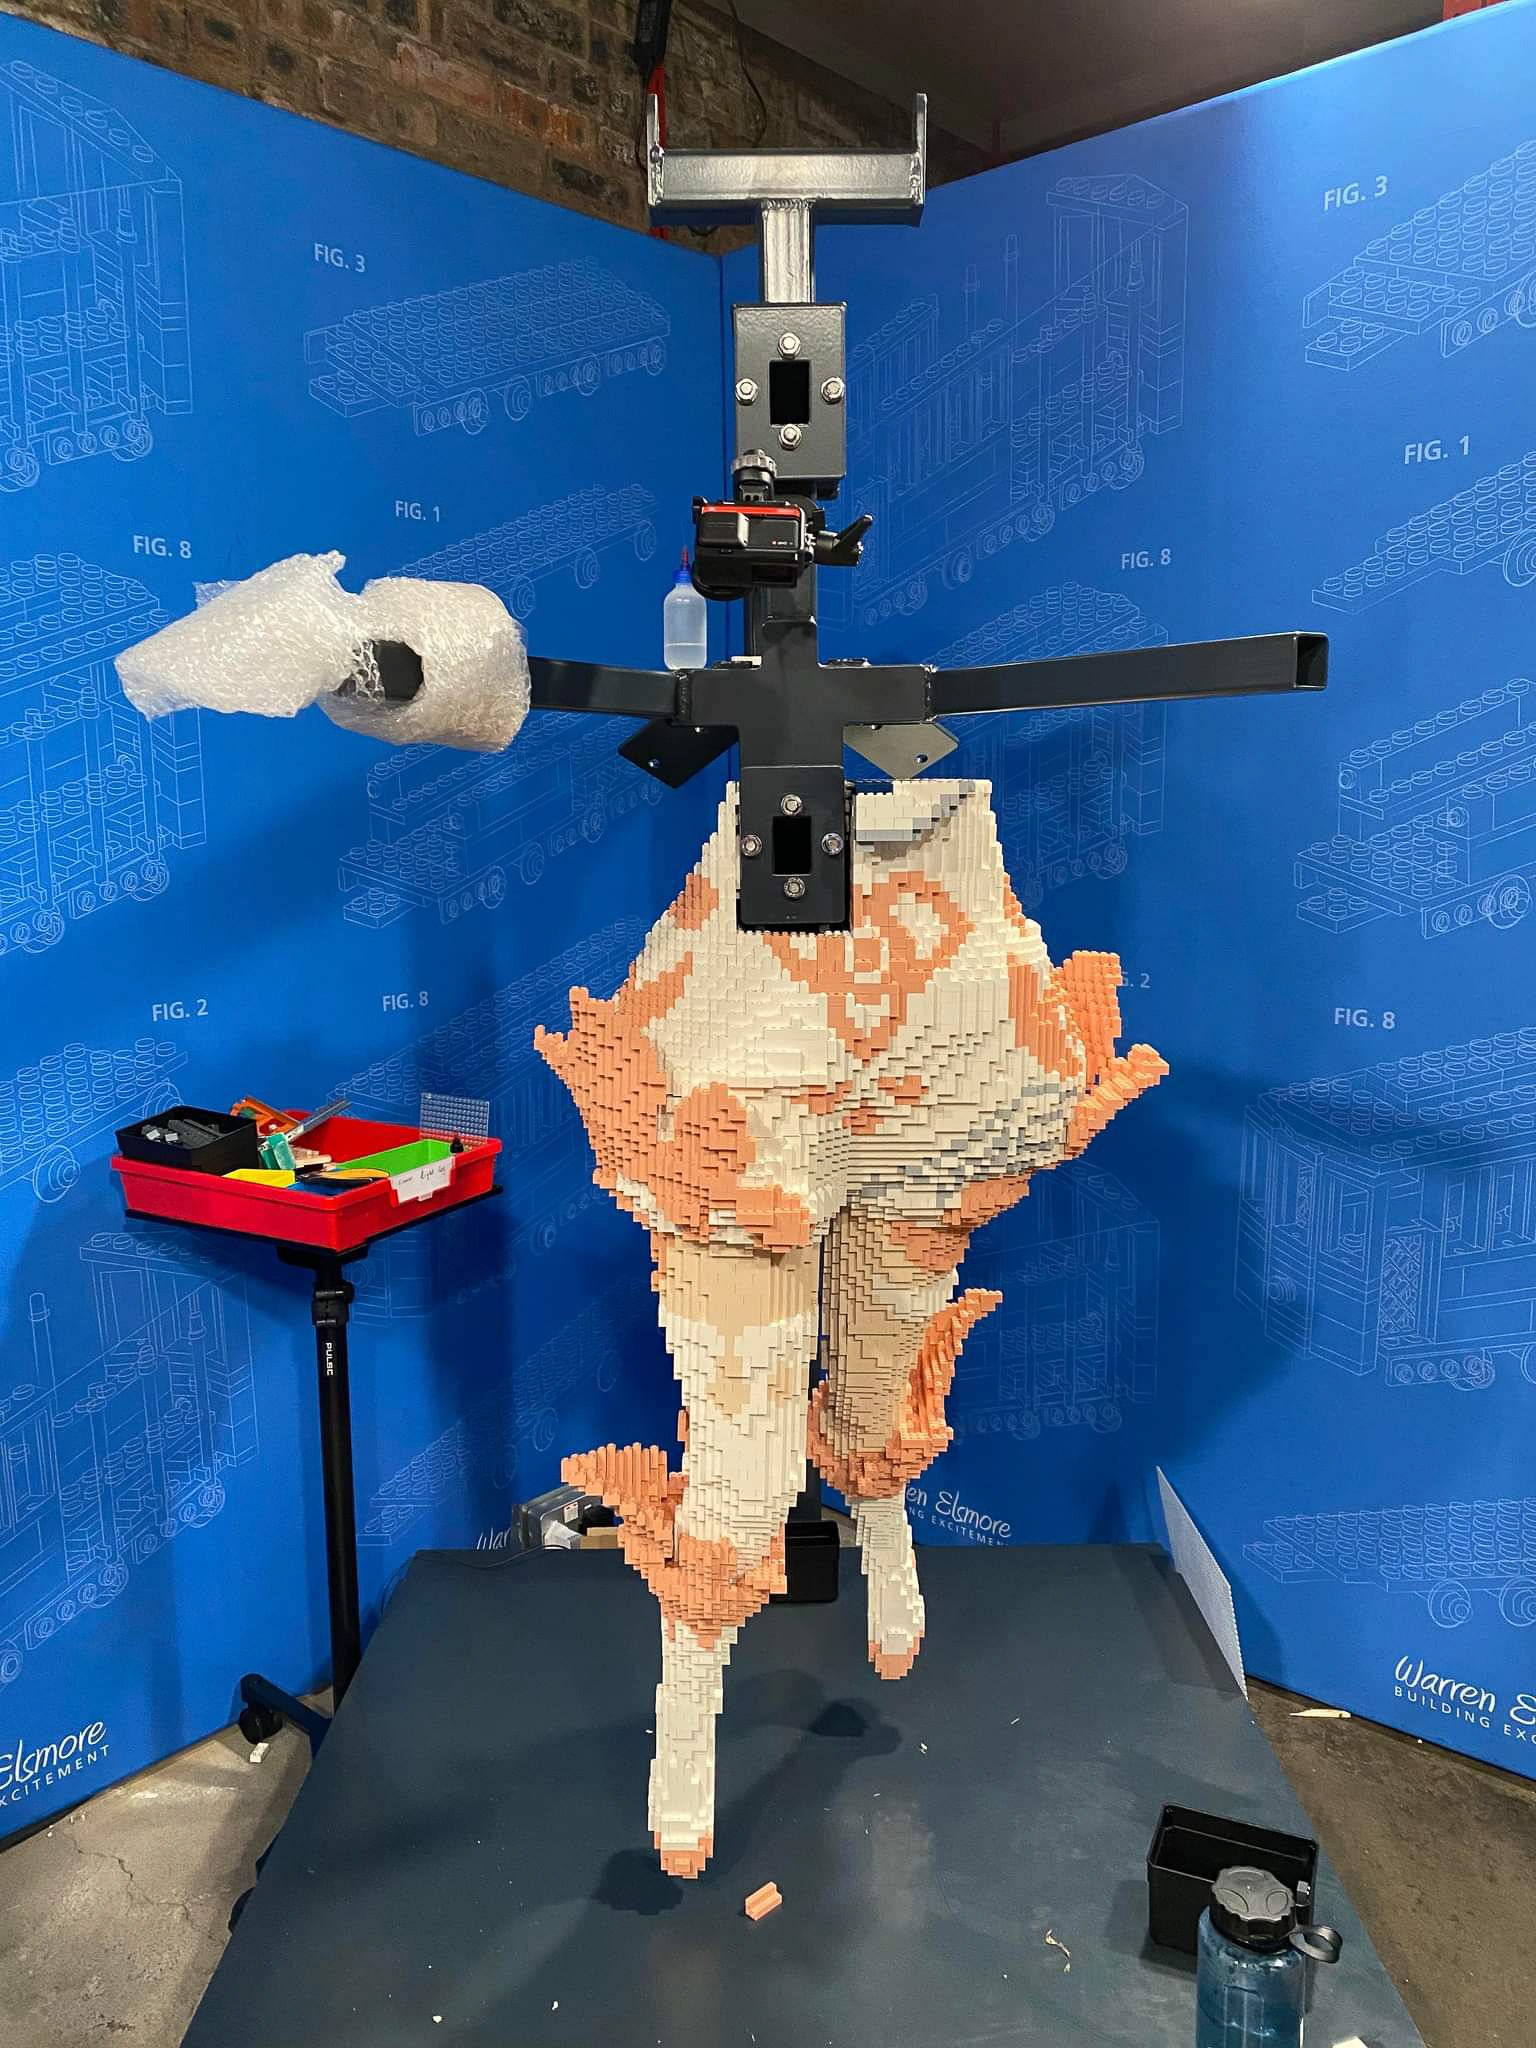
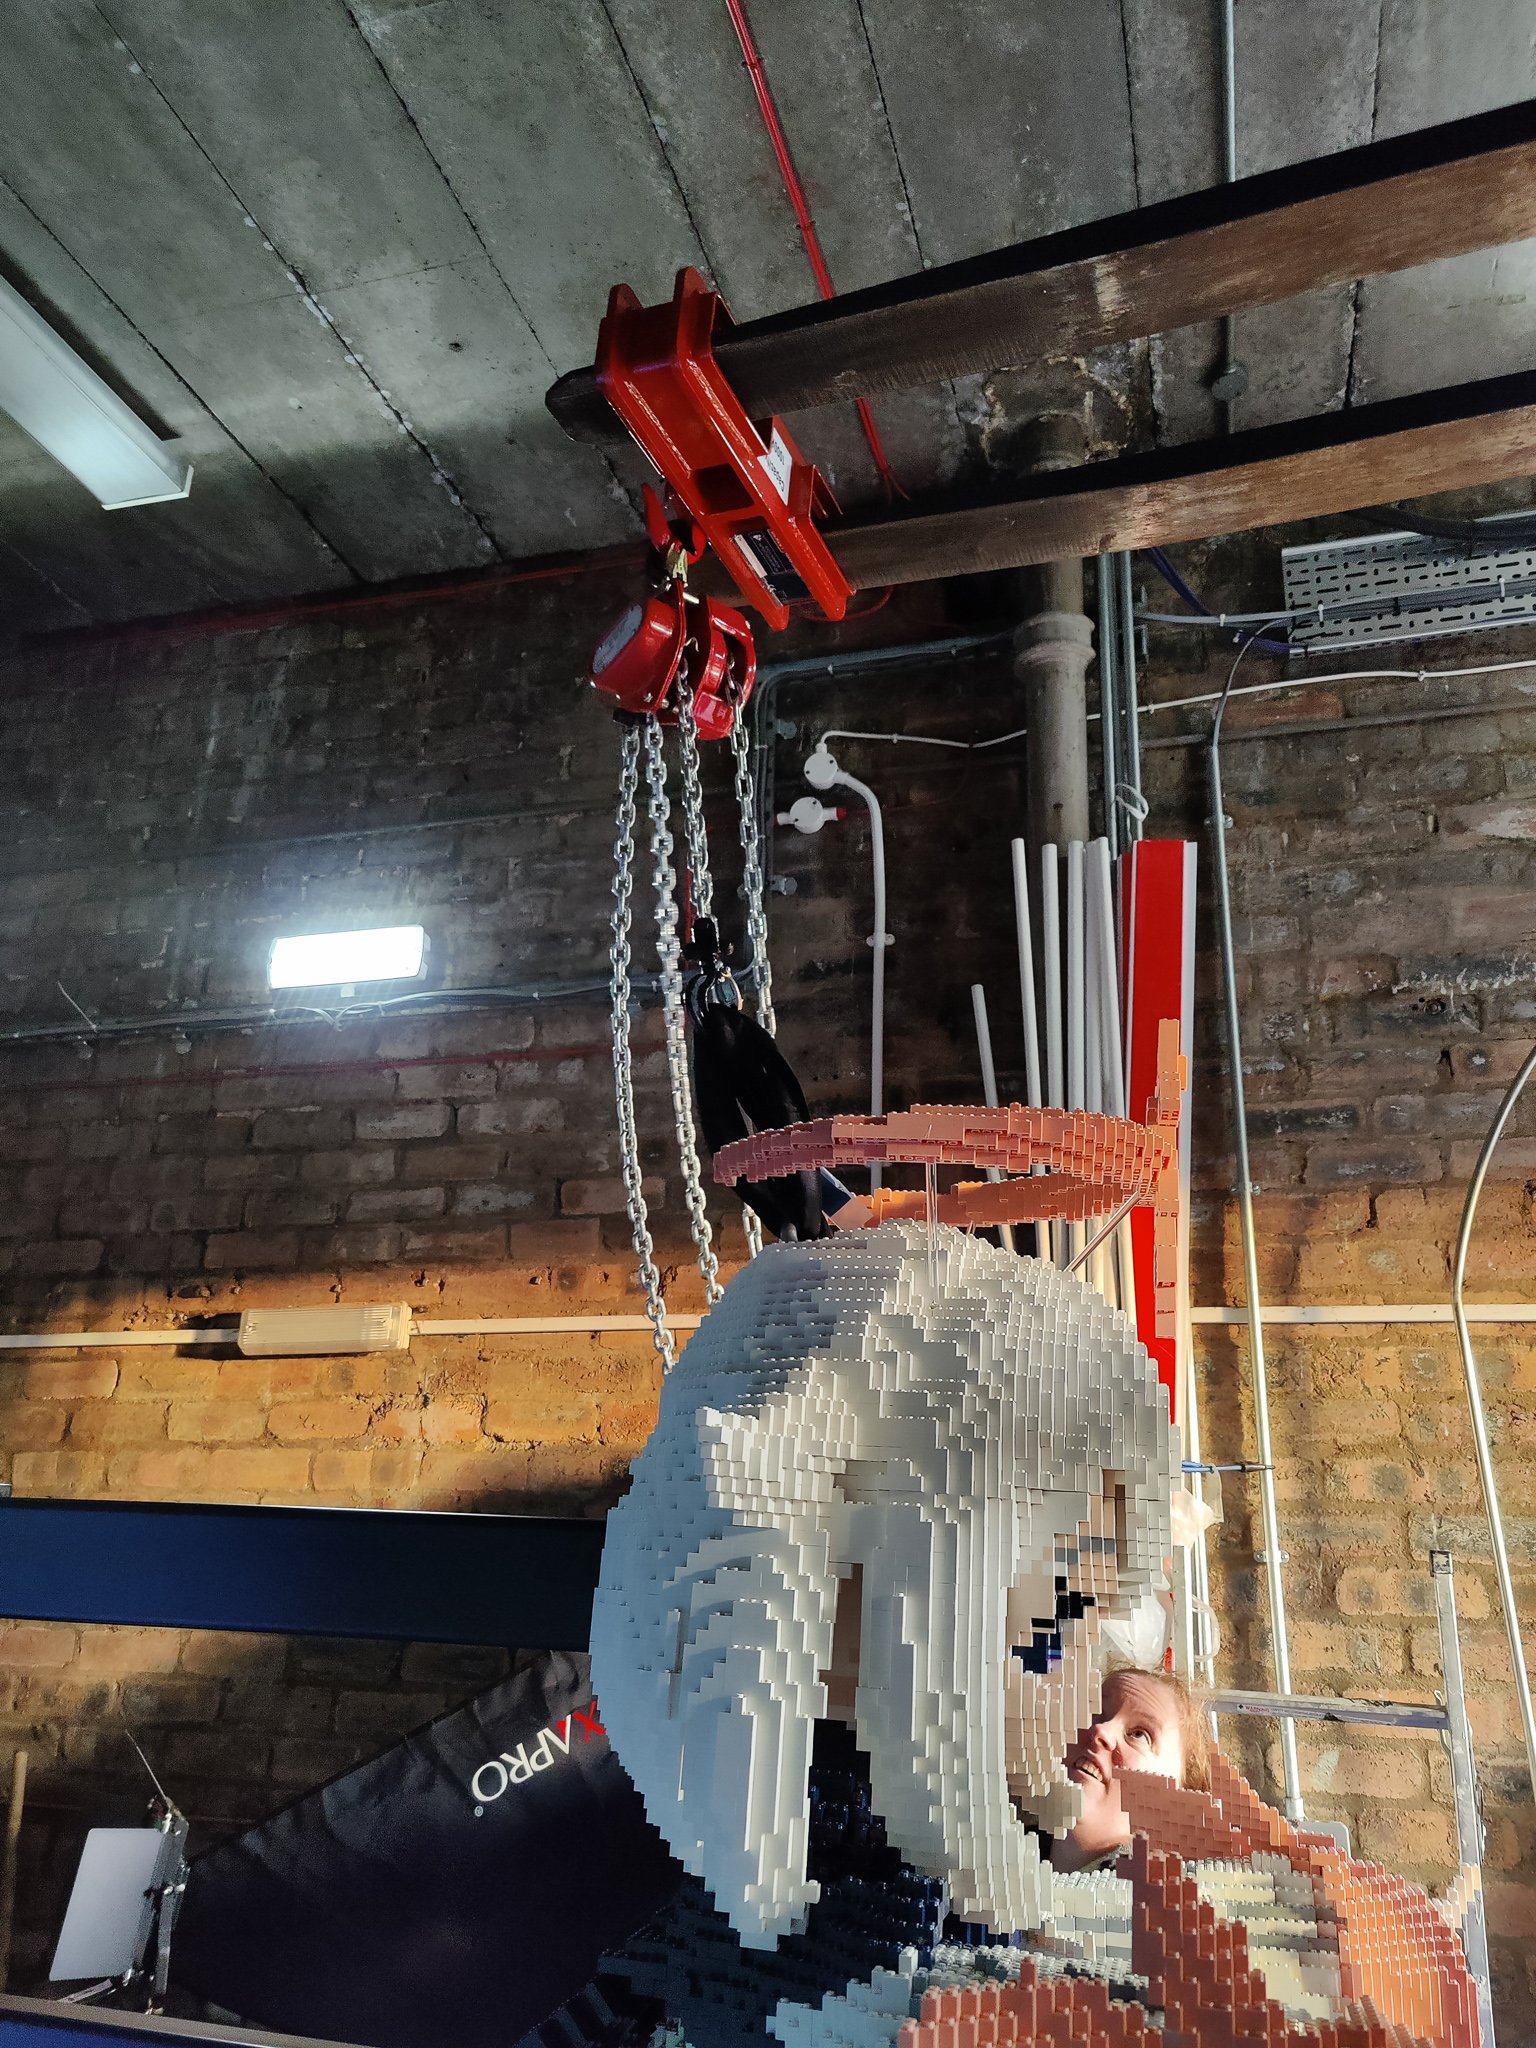
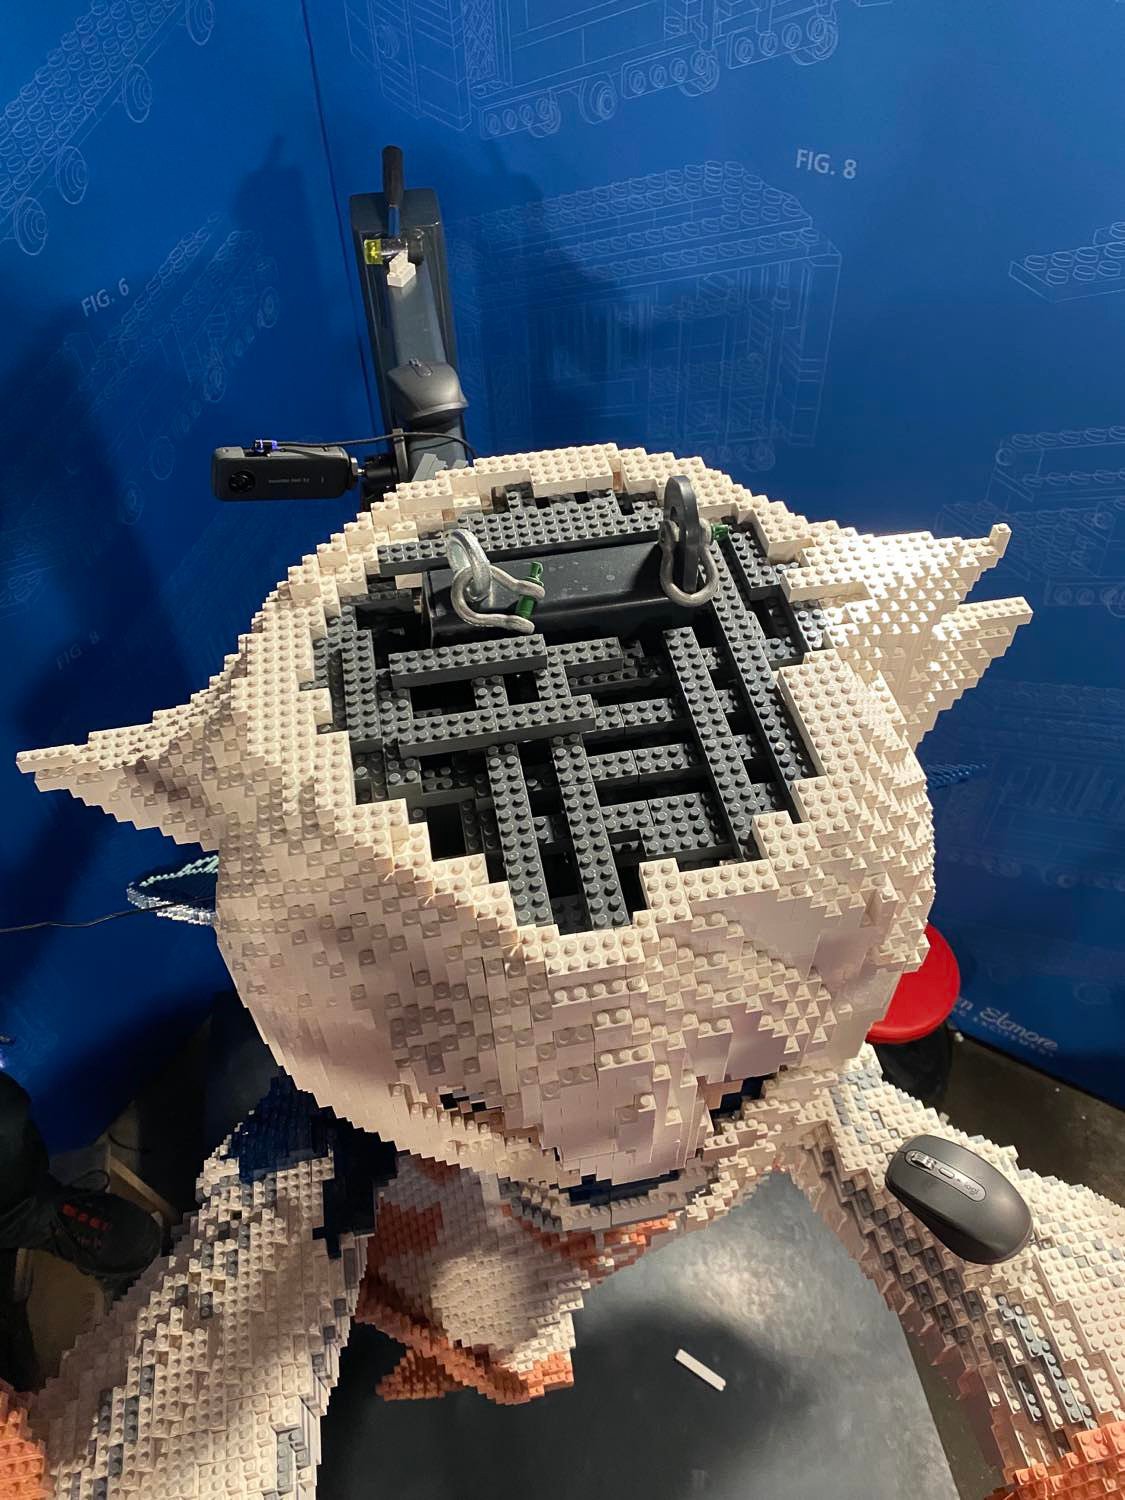
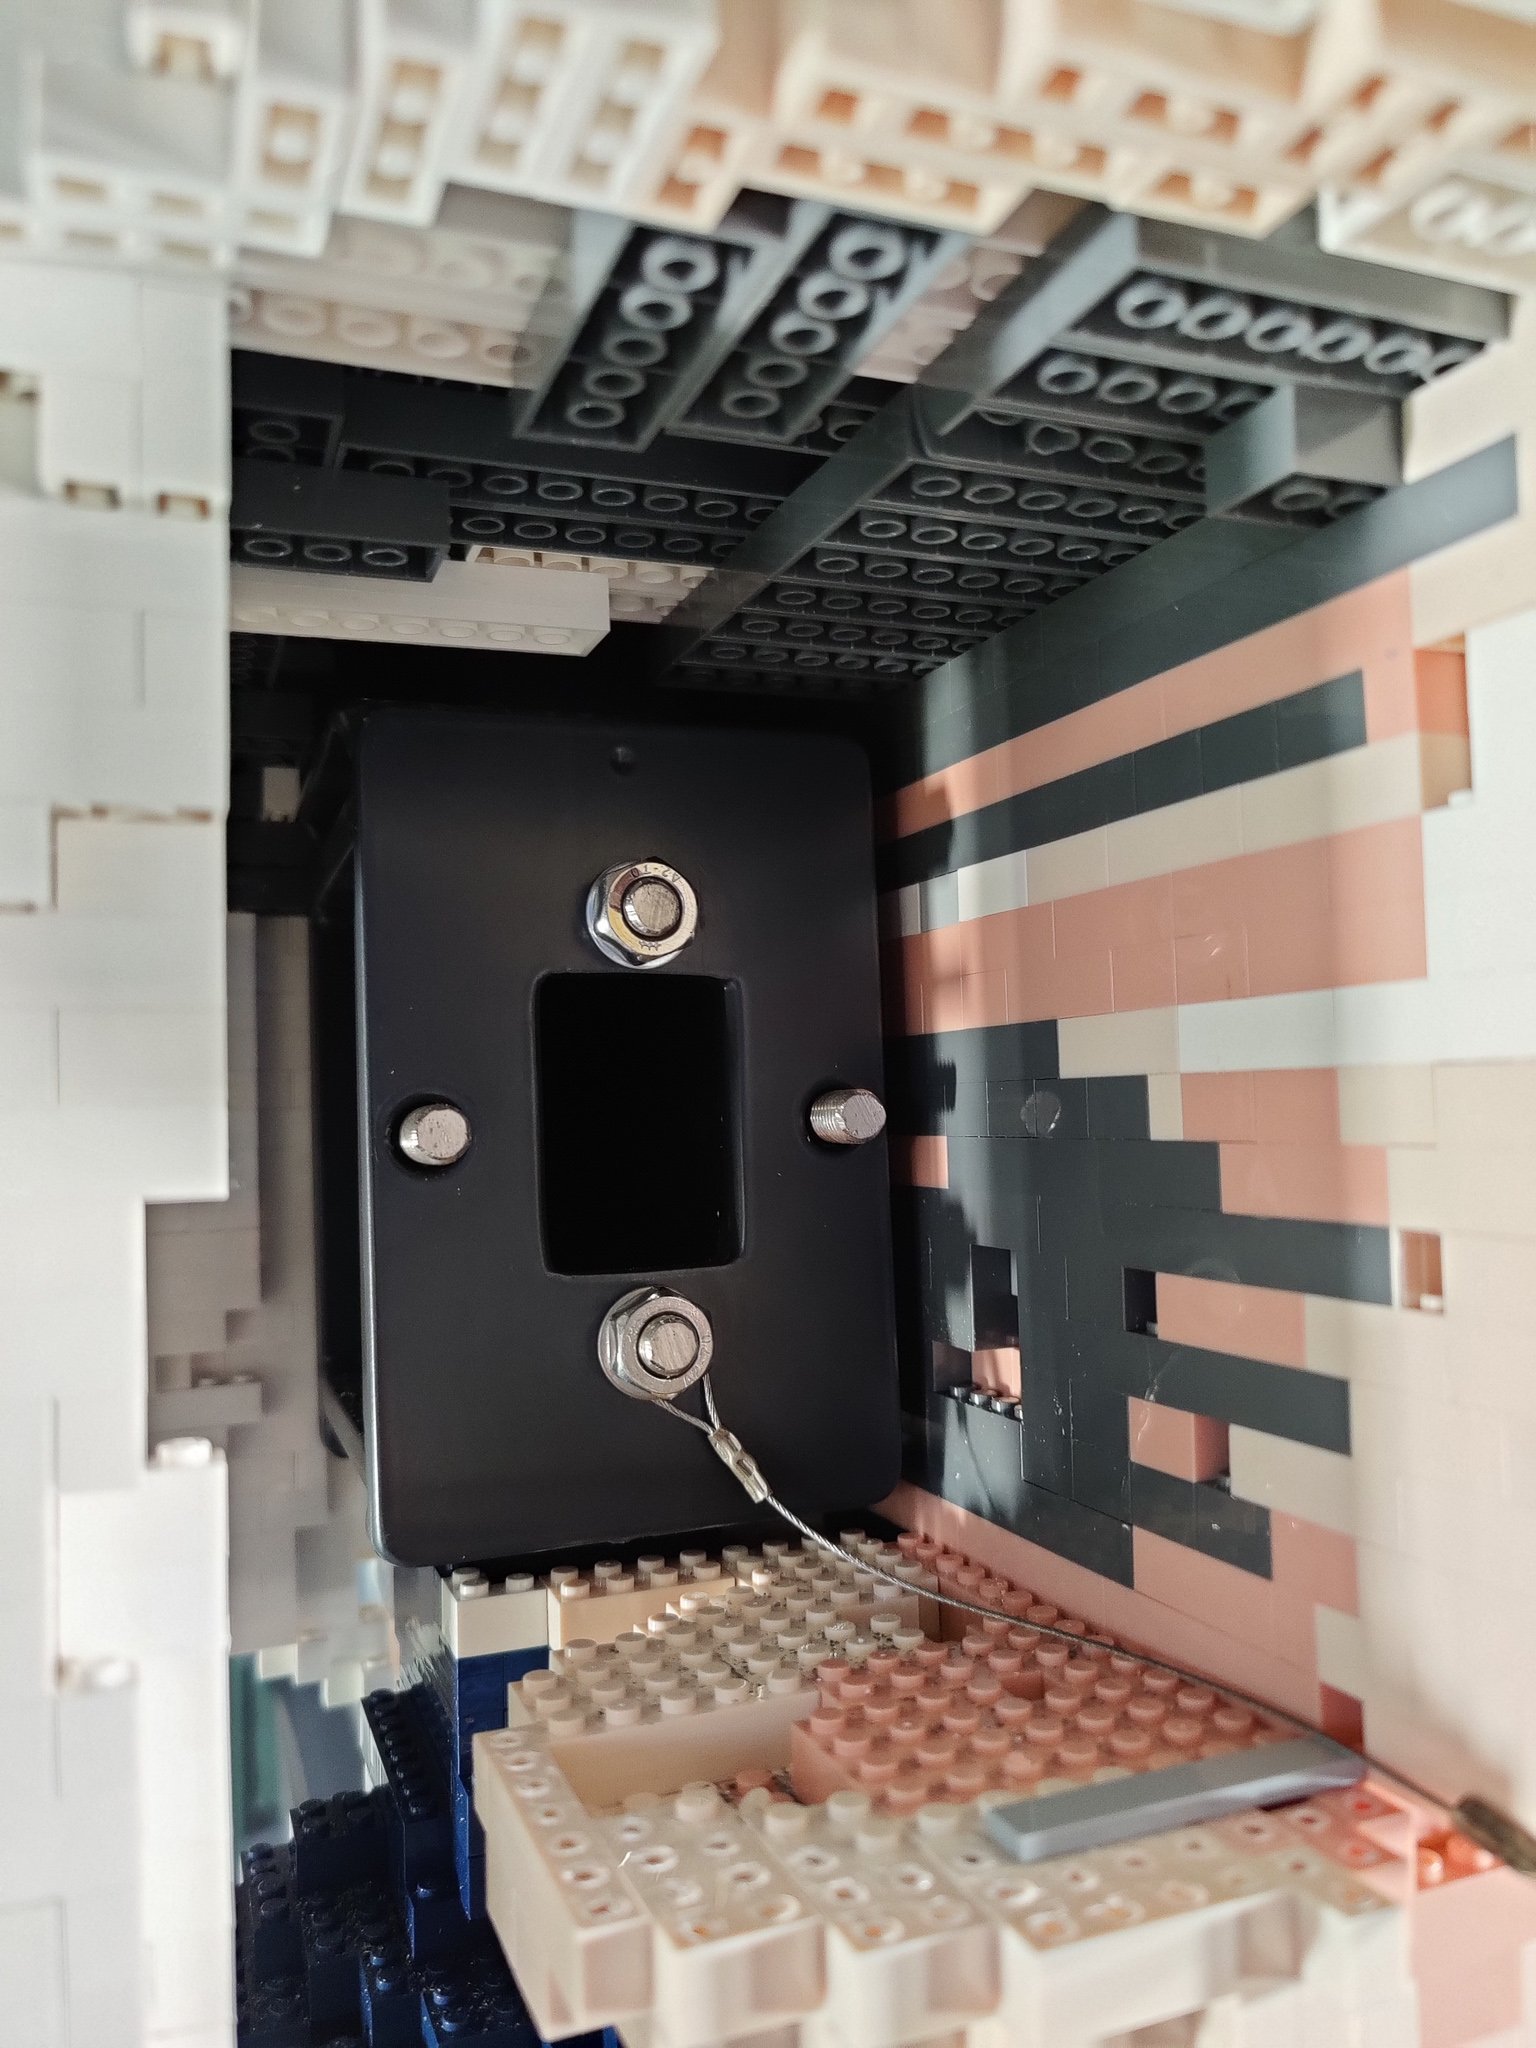
We decided that the traditional method of supporting a figure (from beneath) just wasn’t going to work. It would look awkward and wouldn’t show off the character to its best. So, we’d ‘fly’ them from a rear support. Bearing in mind the size and weight of the model it was going to be a big bit of steel!
Main Design
With the main part of the design done, it was time to finesse the design. We needed to turn the architect’s drawings into something our fabricator could actually build - and the LEGO design into something that was buildable.
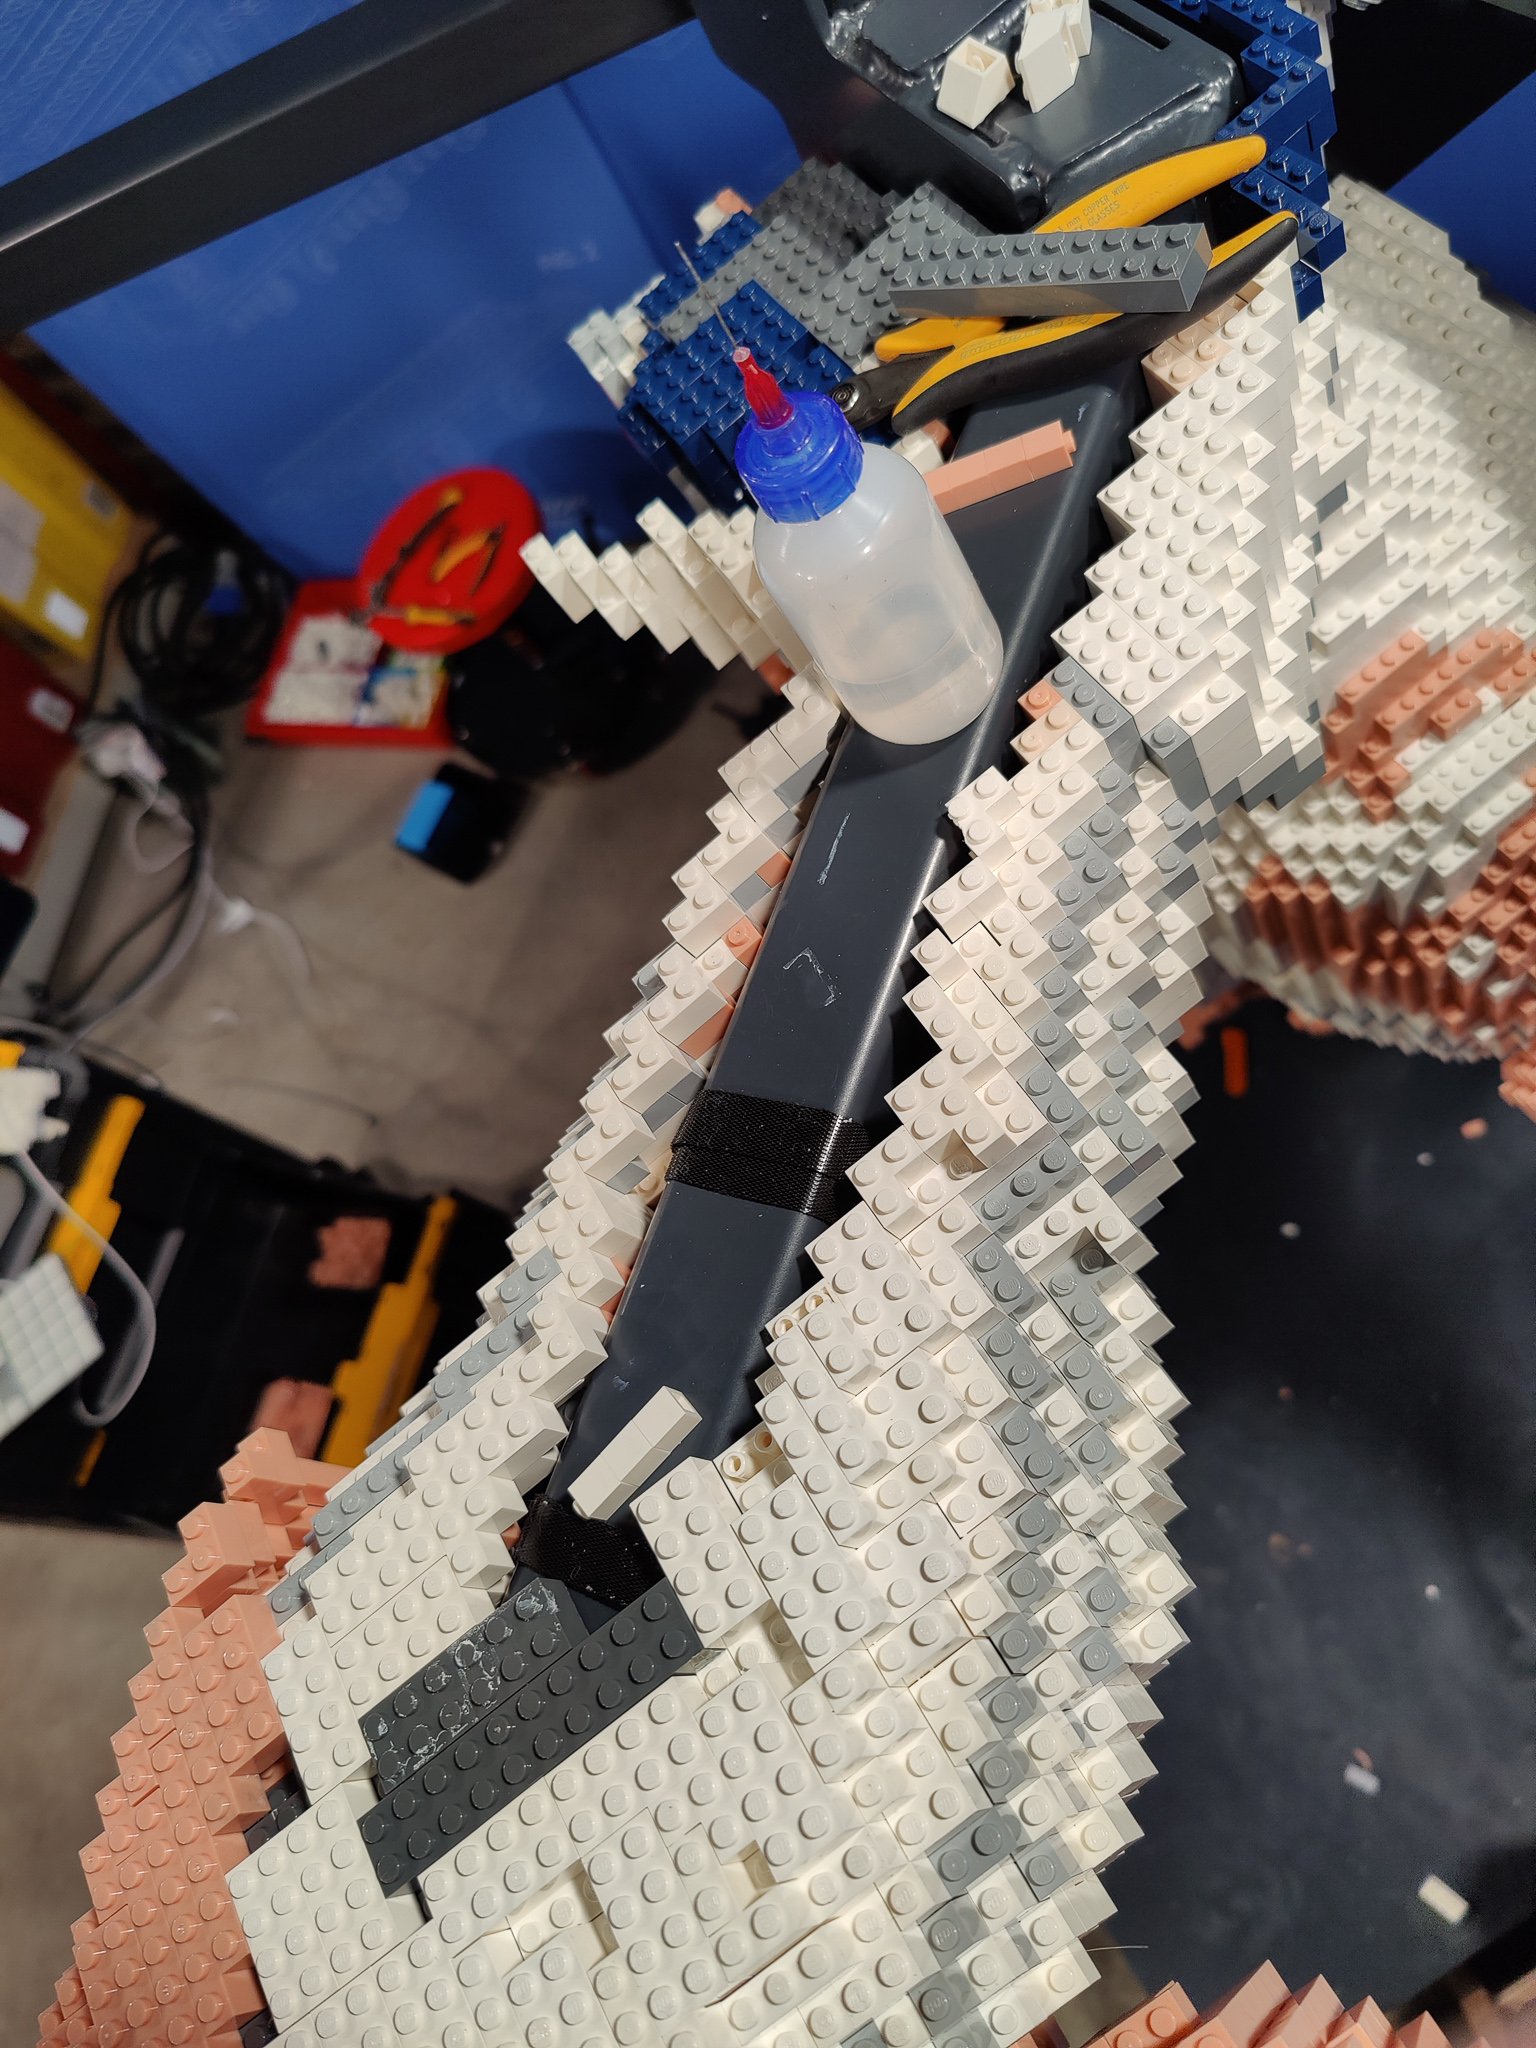
Over a period of a couple of weeks, these slowly started to take place. Whenever we work with steel we have to be conscious of the material. LEGO bricks (and other similar bricks) are very precise and very stiff. Much more so that steel! Any gap larger than about 0.2mm is generally visible in a LEGO model - but steel usually isn’t and it also bends! Thankfully we have a great fabricator.
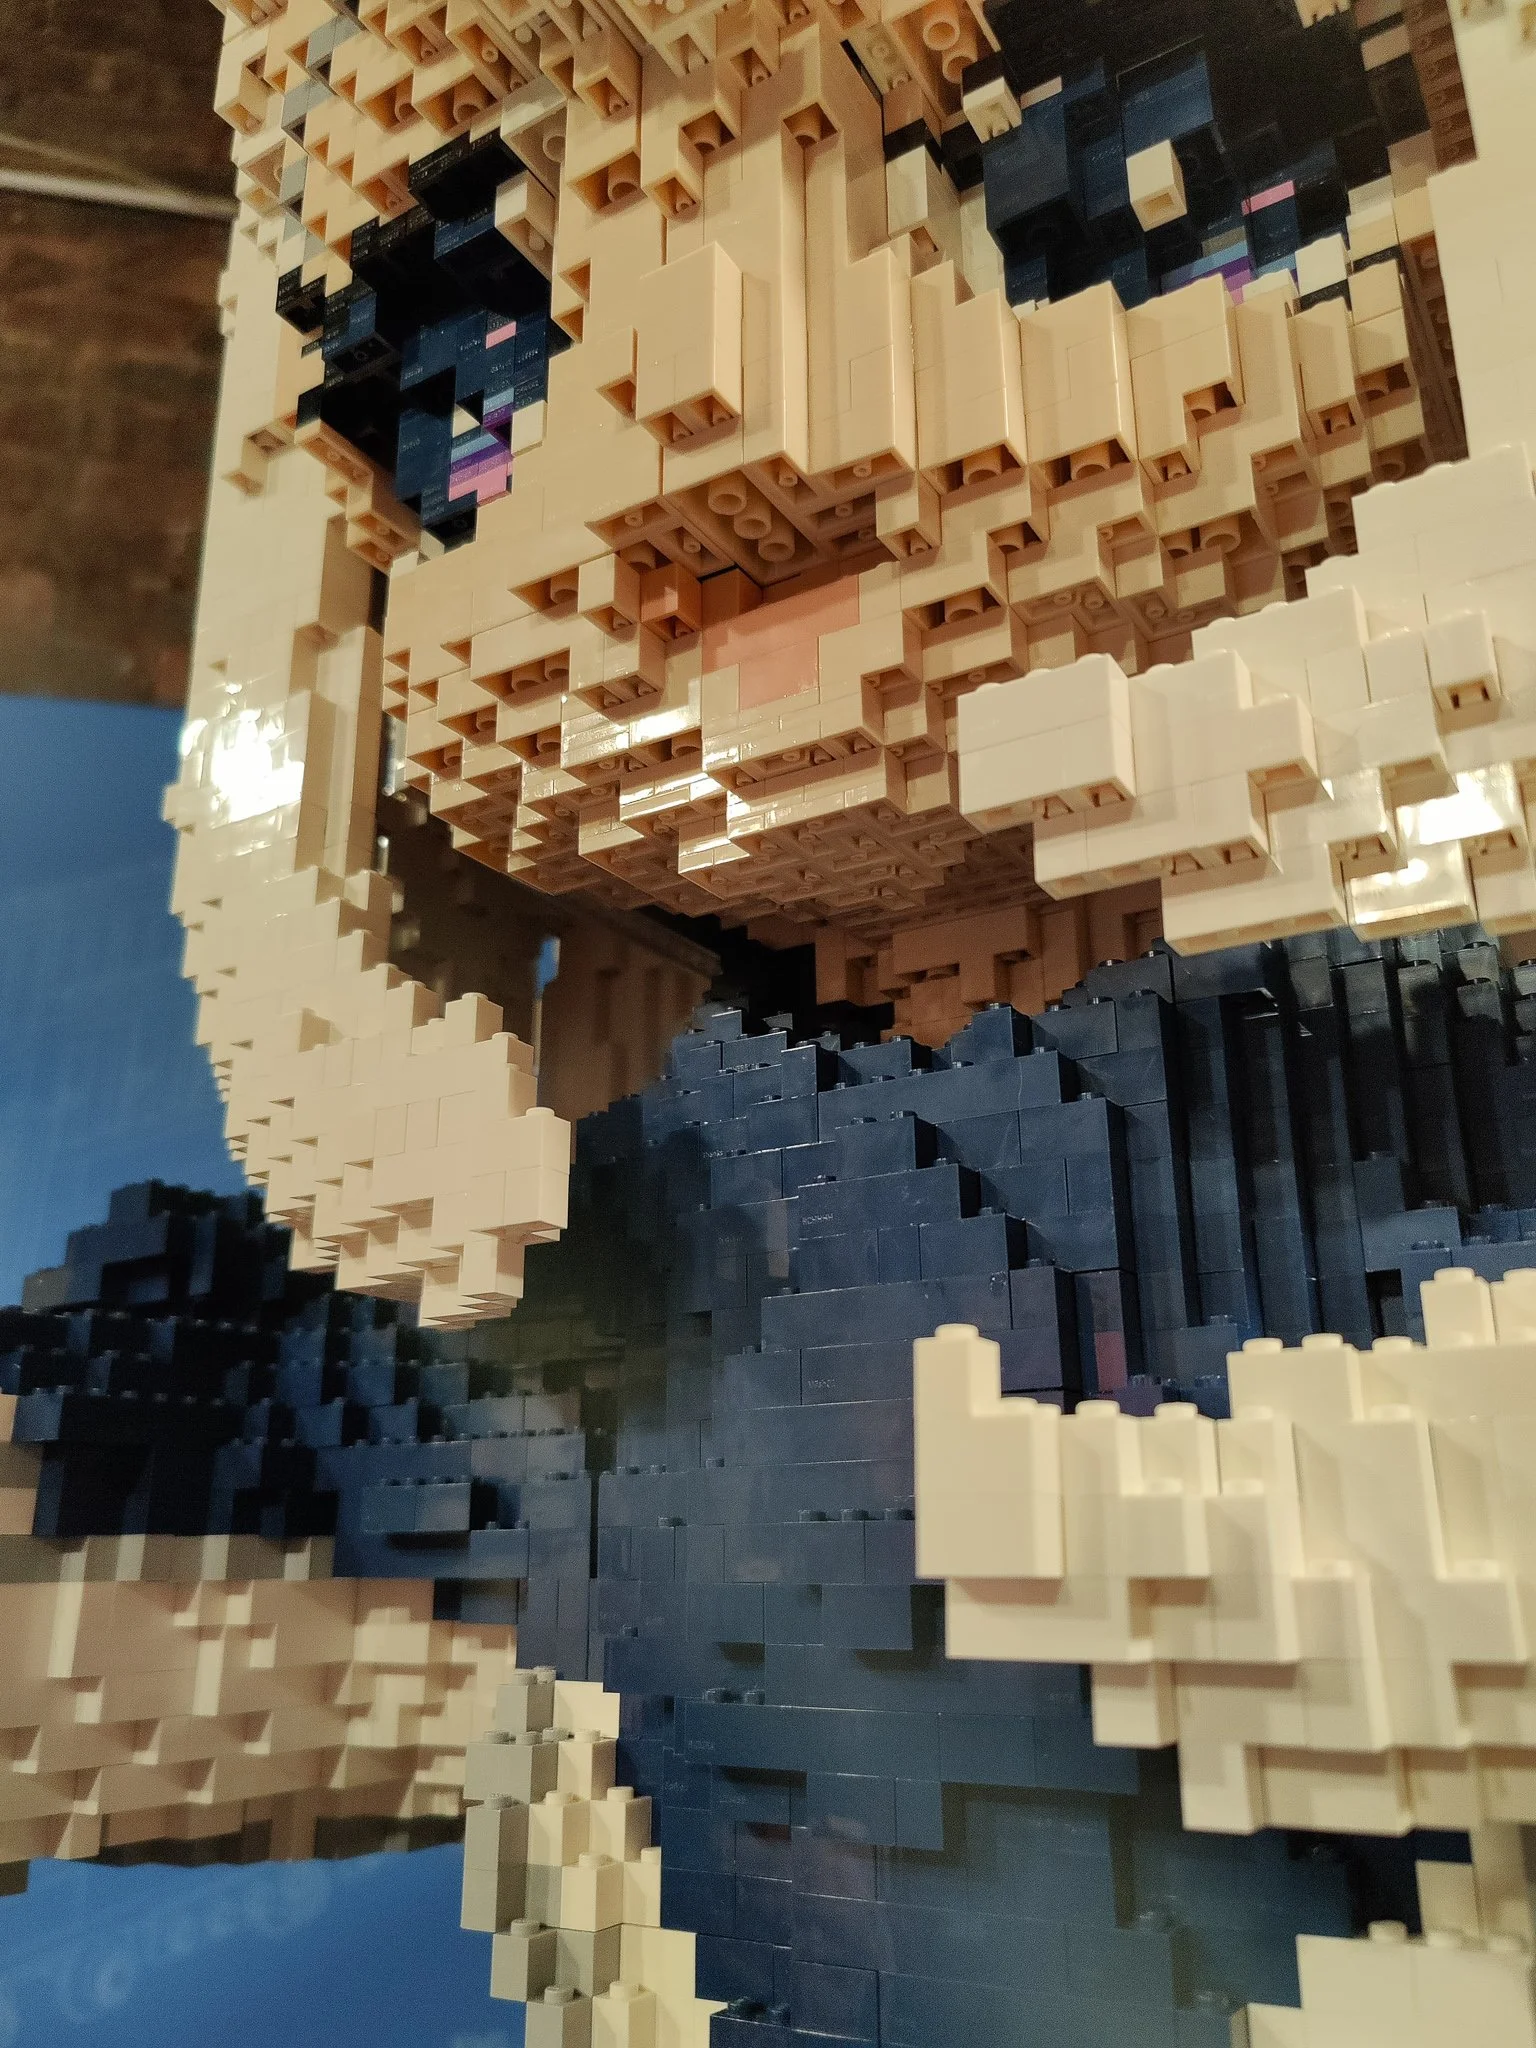
Adding the patterning to the model, and designing the facial features is something that we always do by hand. If you’ve ever seen a LEGO sculpture and think ‘that doesn’t look quite right’ - it’s usually because it’s been built exactly to a computerised version of a 3D file. That means approximating all the features instead of highlighting them. Take a look at these eyes and you can see the difference:
The original eye conversion, plus a manually created version to the right
The final eyes, built in 3D
Fabrication and ordering
With everything now designed, and the cilent signed off on the final design - it’s time to actually build something! At this point things start happening at the same time.
The first item on the agenda was to order the bricks. We were going to need a lot of bricks. At this point, AFOLs might want to look away! As we had to use an exact colour for the skin and clothing, we wouldn’t be able to use LEGO bricks for those. Instead, we worked with a Chinese factory to colour match the on-screen RGB colours with real-life plastic moulding and create bricks just for us. The only downside of this approach was of course that we had to make a minimum order of 500Kg (approx 1000Lbs) of bricks!
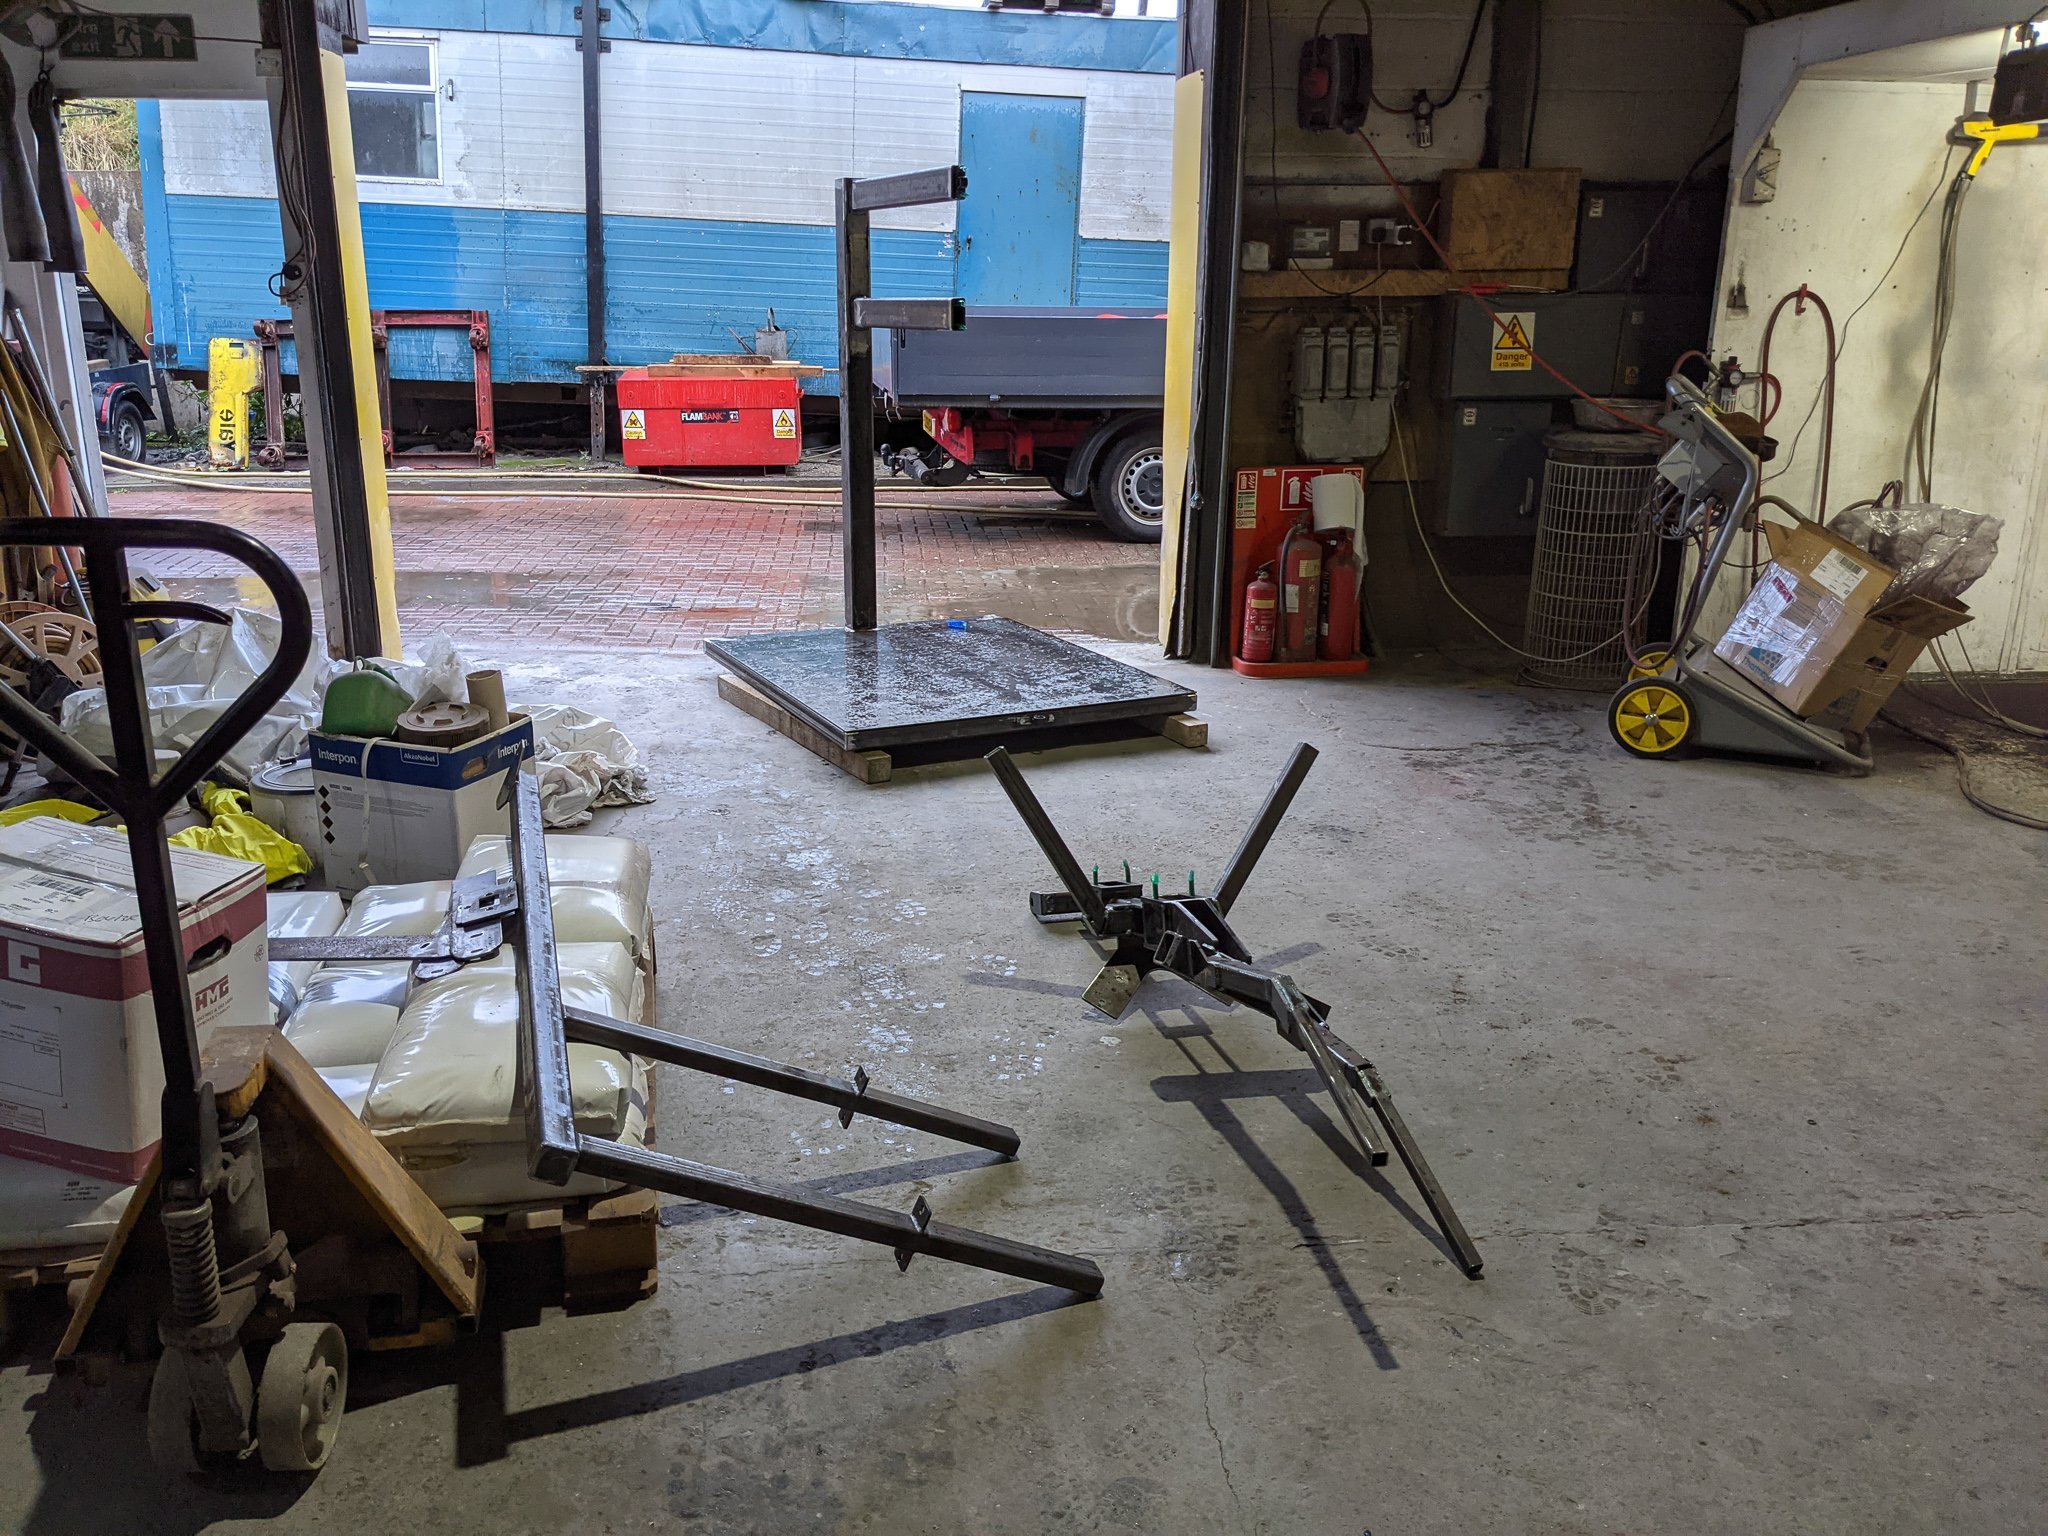
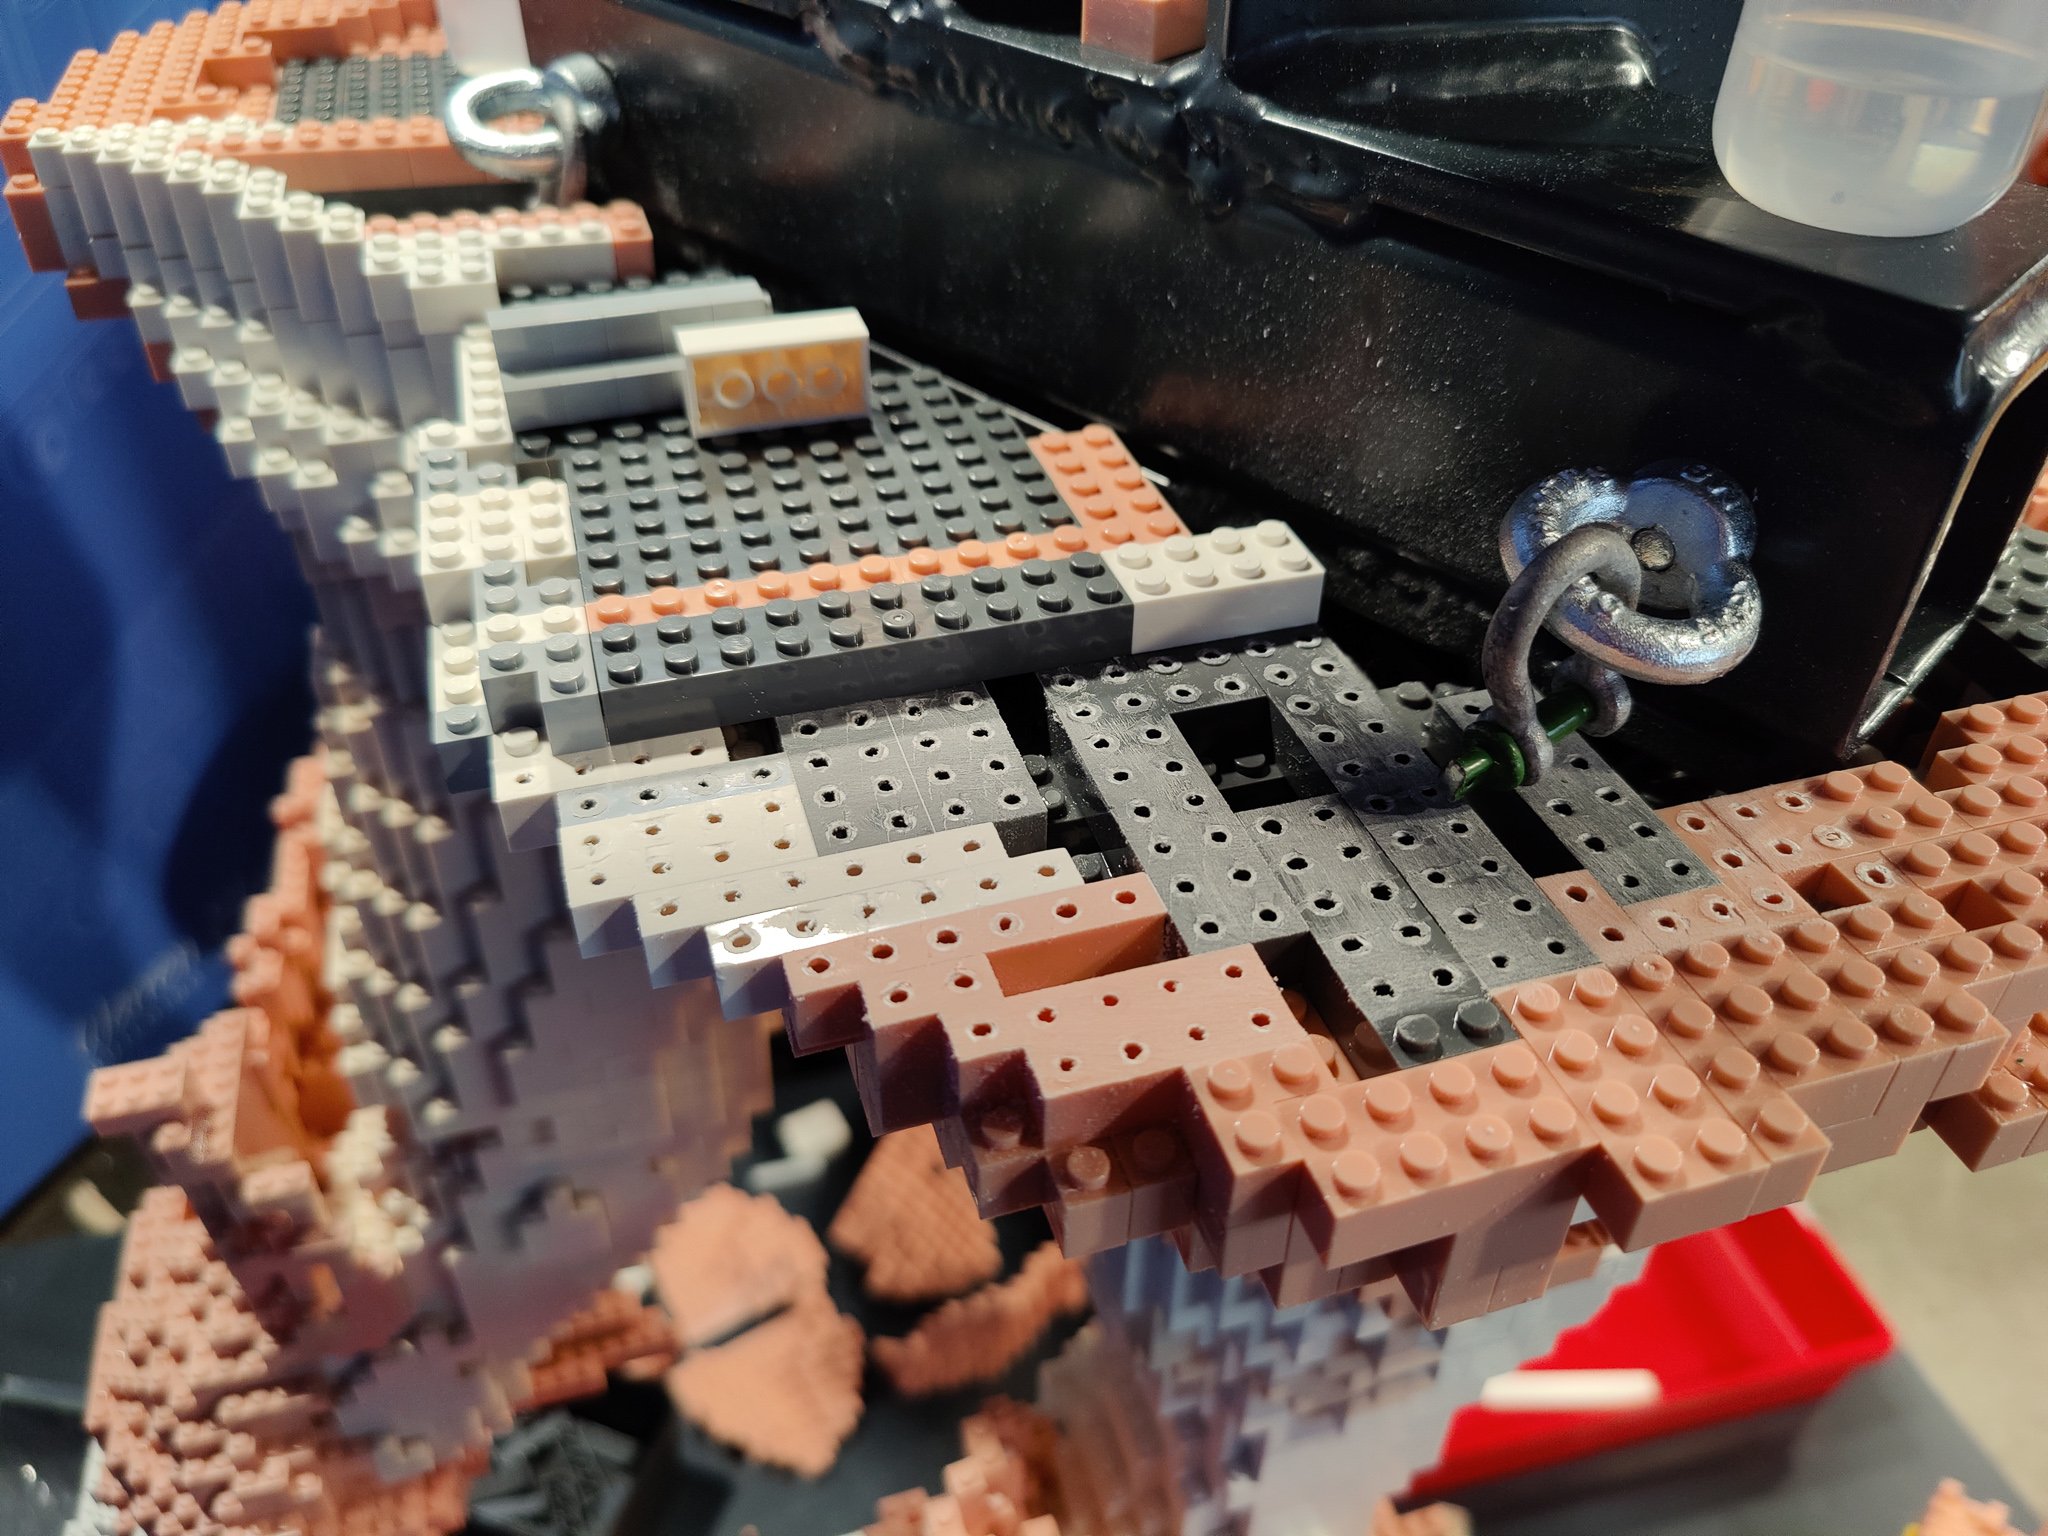
With the bricks on order, we commissioned our fabricator to start on the framework. He had to order in some of the larger members which in his words “would easily hold up a house!”. Although it looks like a simple frame, he had to make sure that the angles we’d designed were exactly created. Not easy with a welder! Once the steel was complete we then had to have the frame powder coated to protect the metal. With the frame completely enclosed - we couldn’t allow any parts of it to rust away -we’d never see them again!
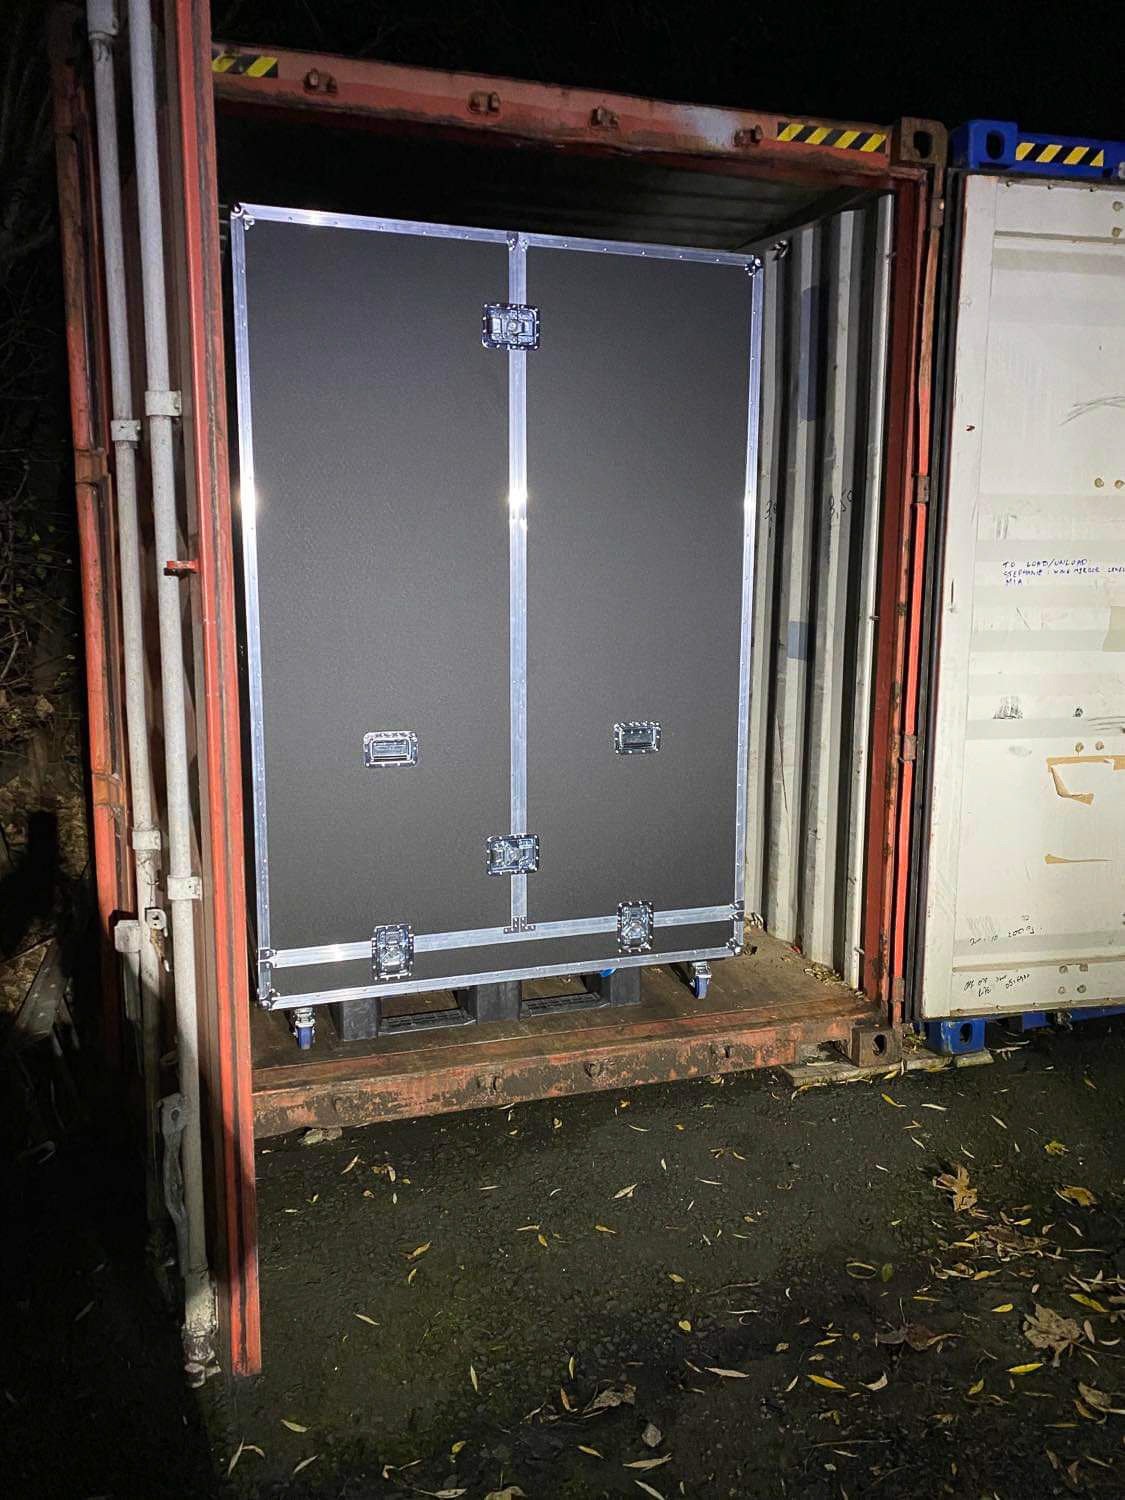
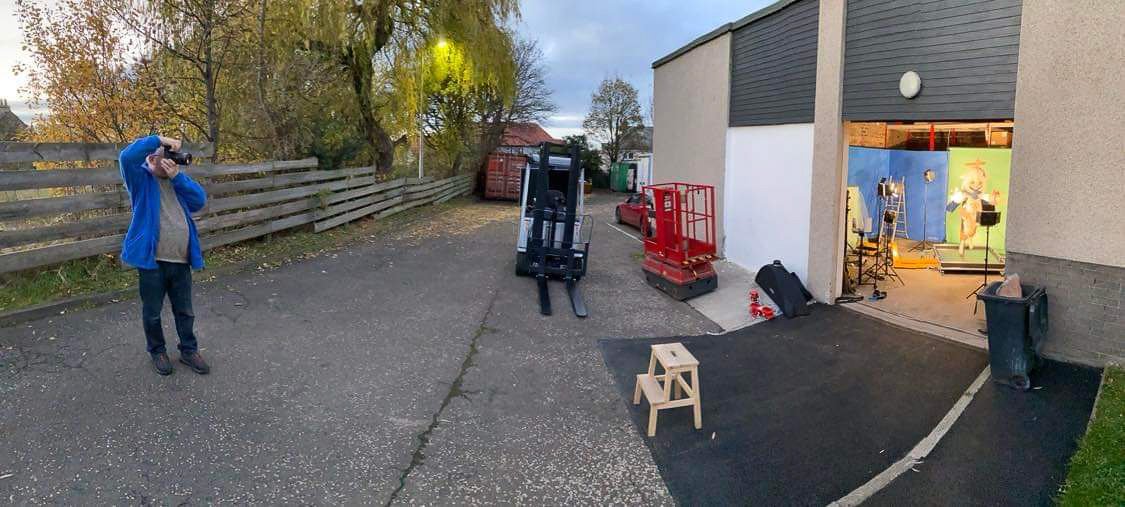
Next up were the ‘extras’, which they were just as important. We’d designed a custom ATA flightcase, the sort you’d see backstage on a rock tour, to hold the model and its frame. The order went out for the case, along with all of the flying hardware required to hoist the model properly and attach it to rigging wires. The last thing to prepare was our warehouse space! The model was far too large to bring into our main studio area, so we needed to create a temporary studio to build it in.

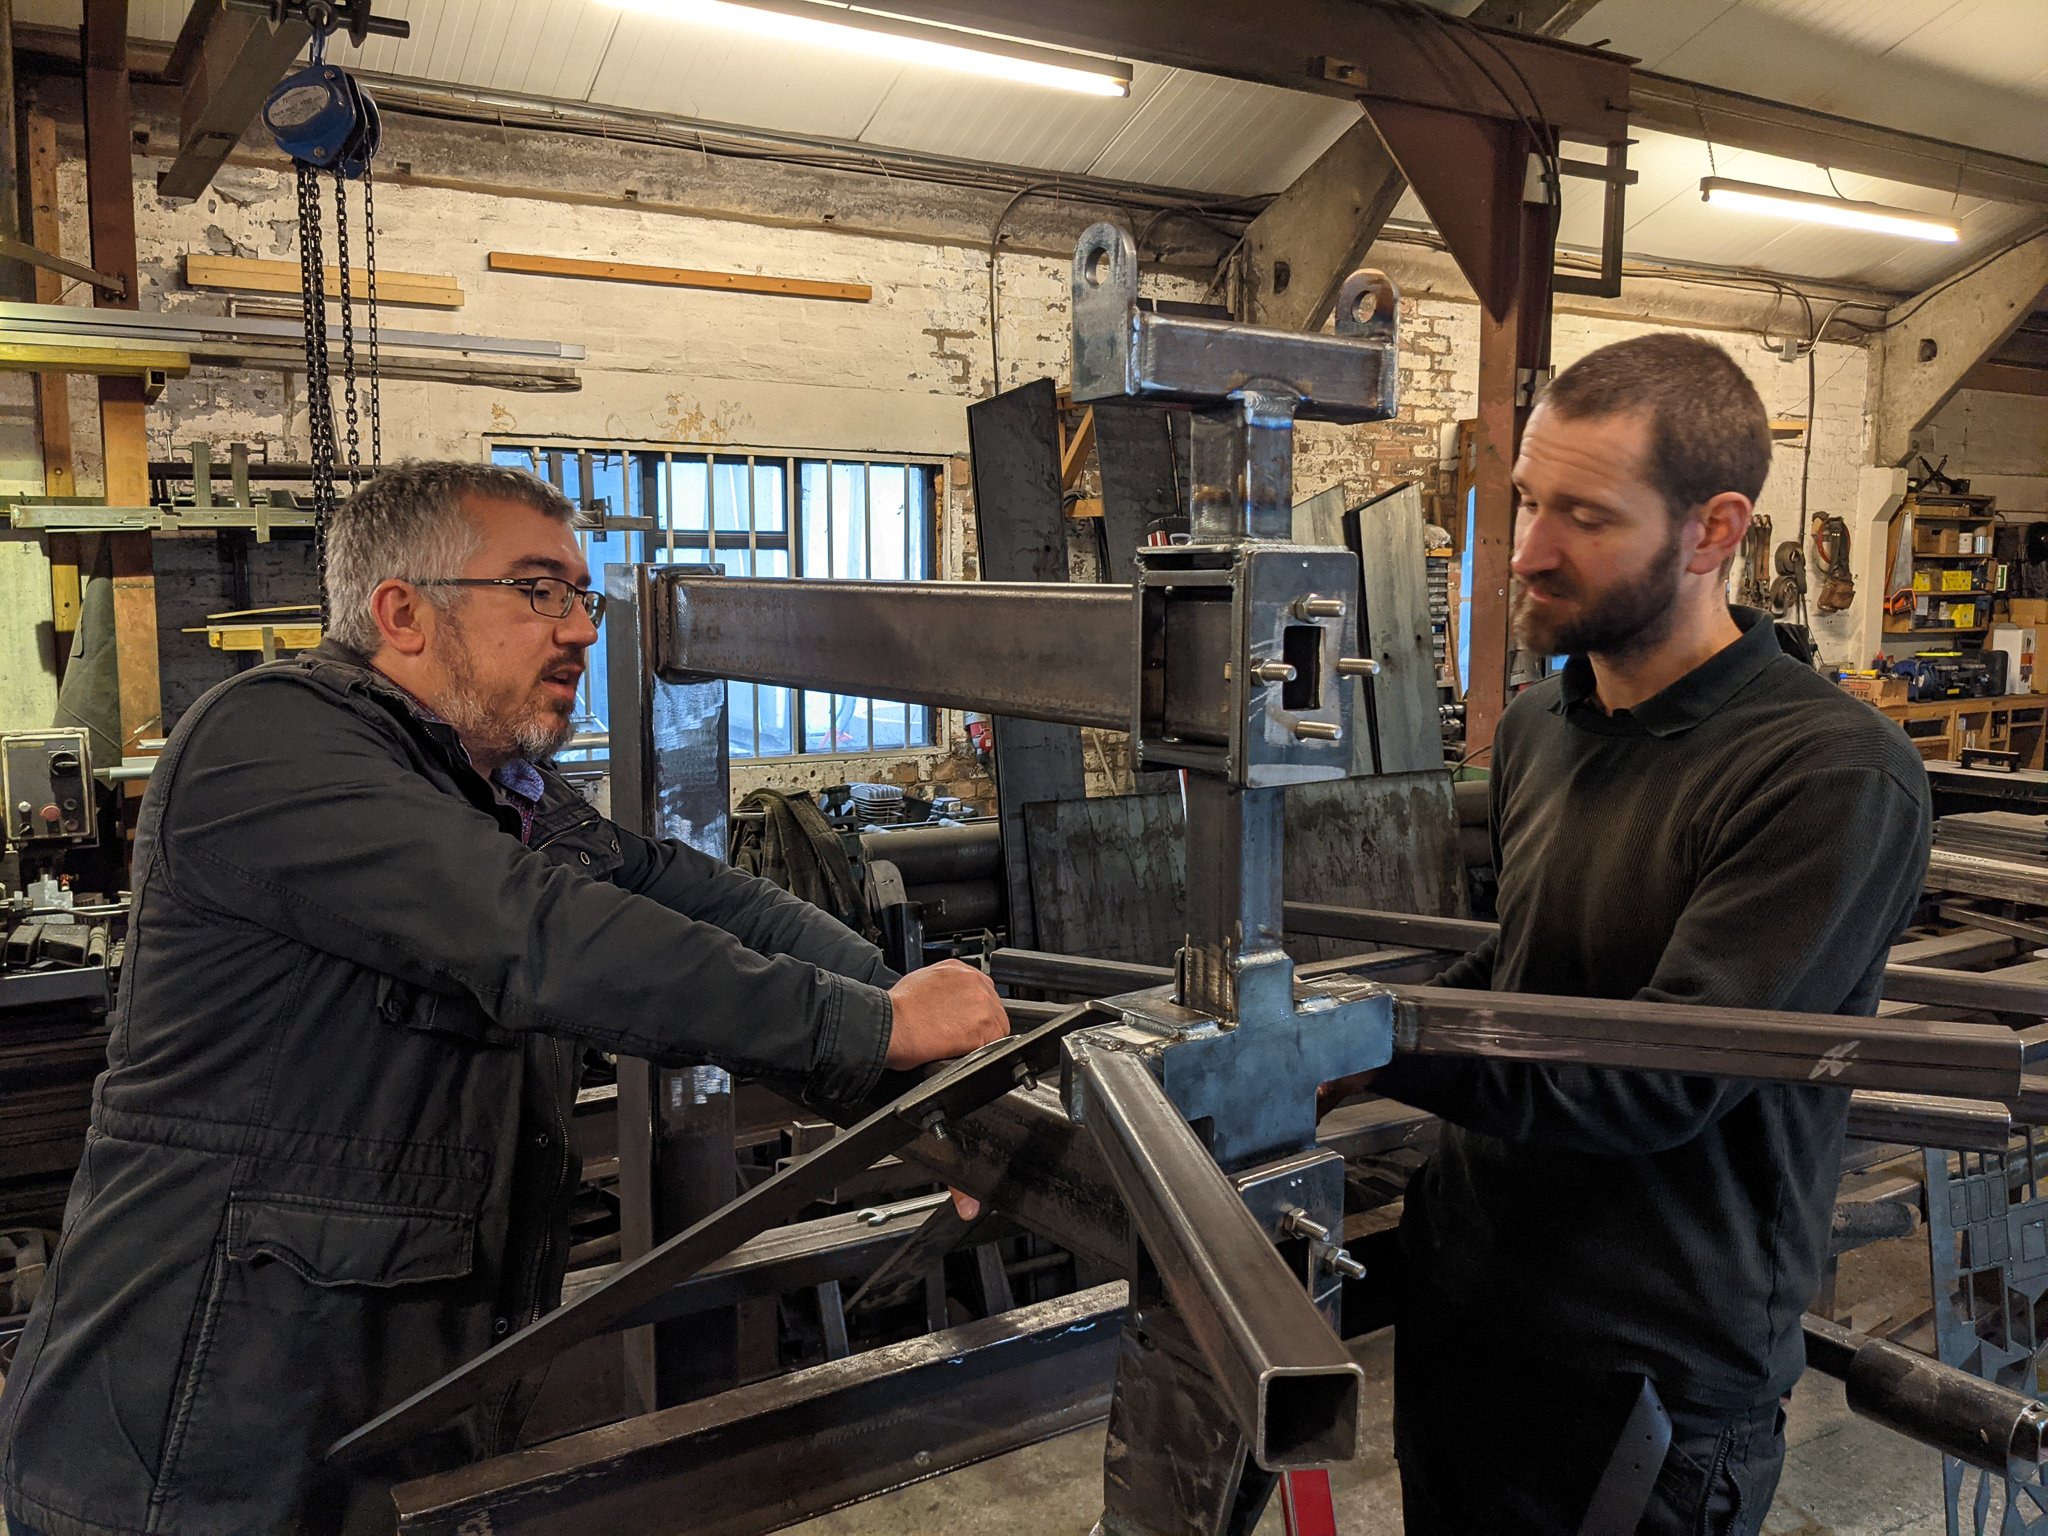
Warren and our fabricator discussing the finer details
Printing

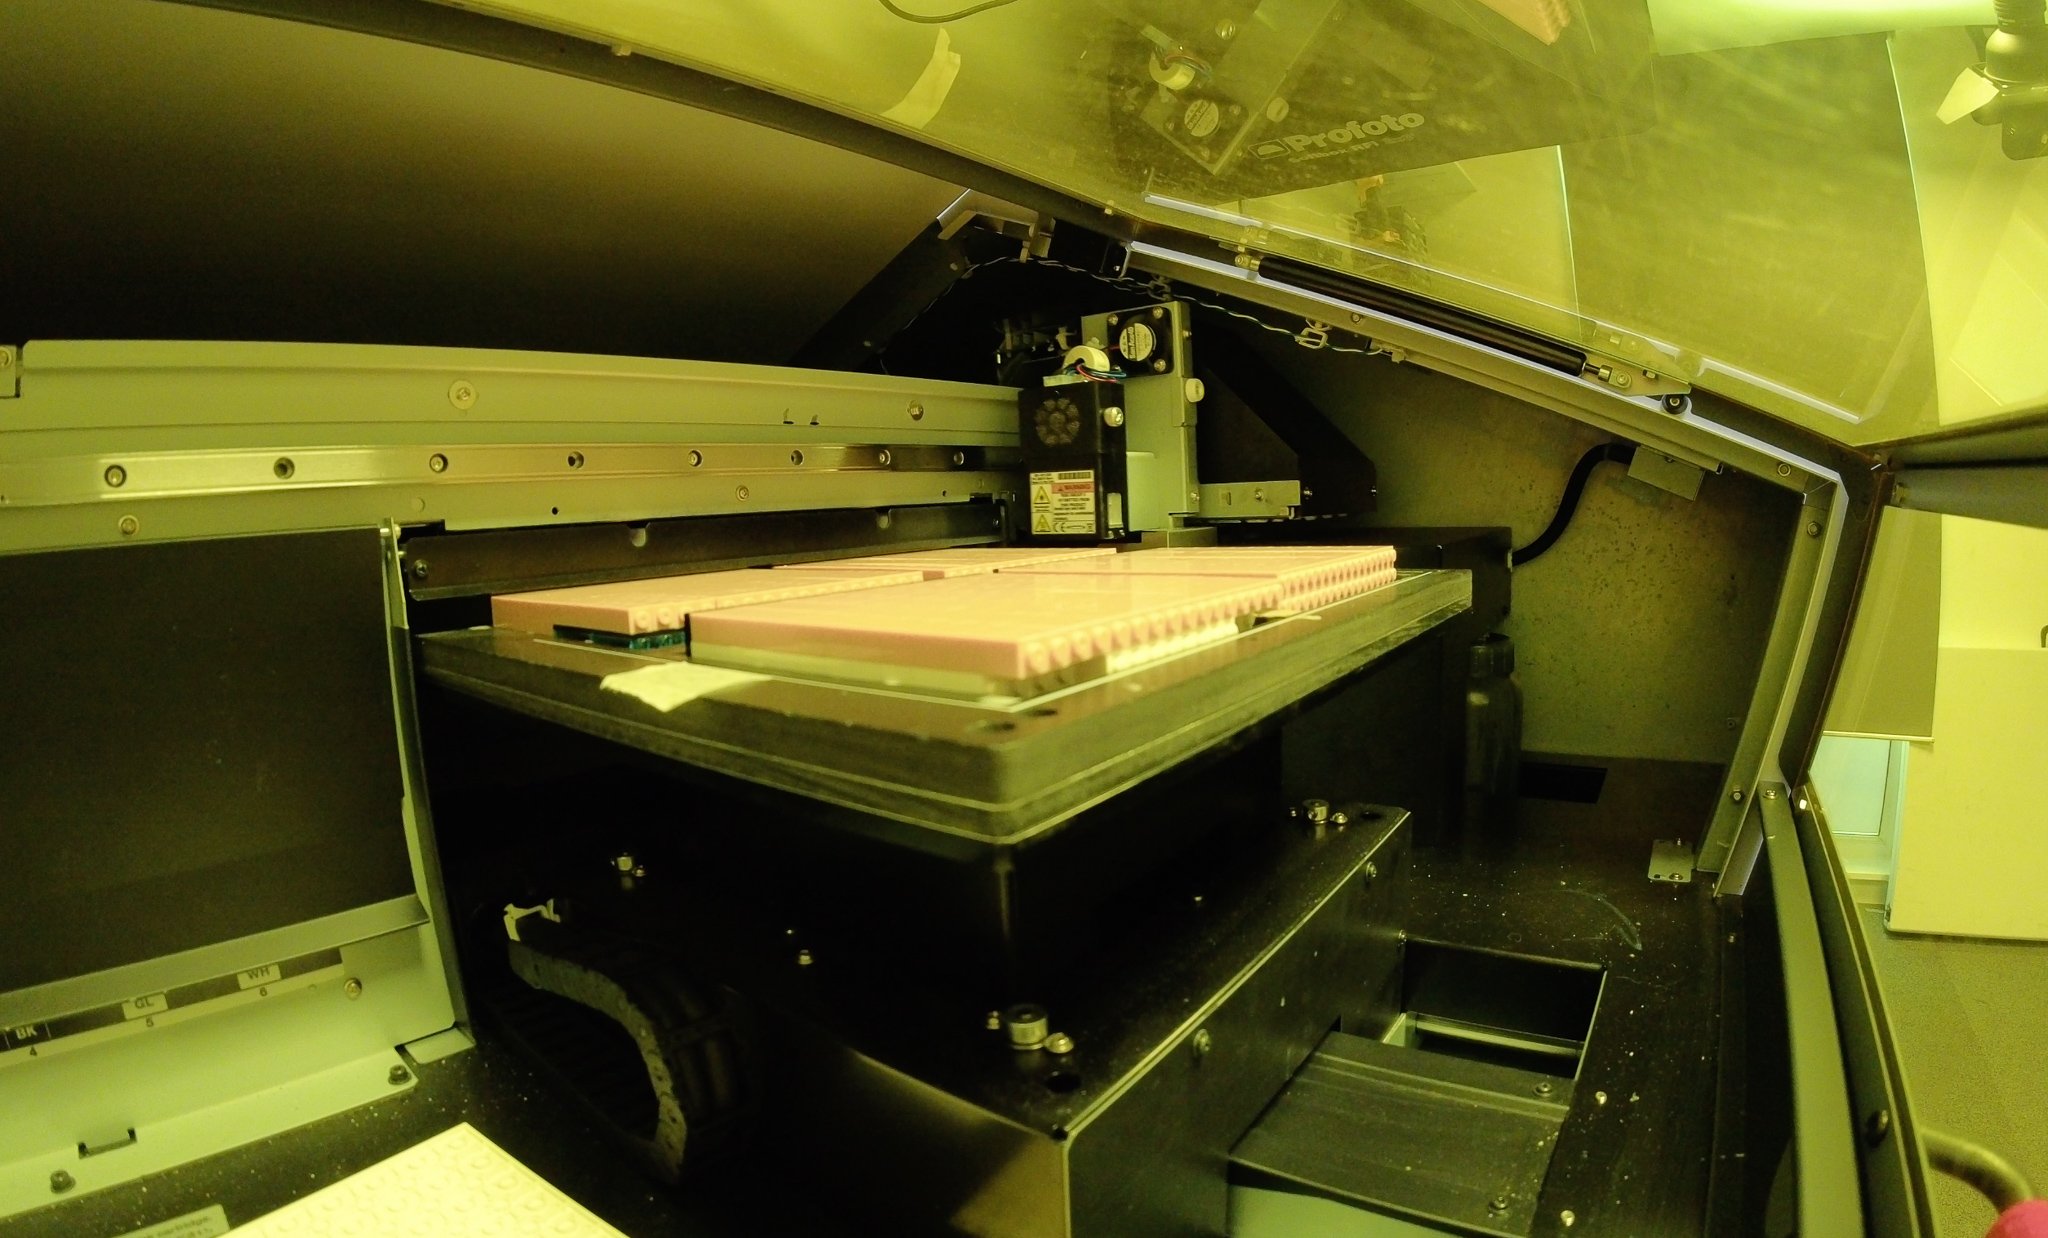
Now, this part was a challenge! You’ll have seen from some of our other projects that we own a printer that can put company logos, text etc onto the sides of bricks. Usually it’s that final finishing touch. This project would be different though.
We were approached with three problems. The first was that printing is slooooow. So we’d only be able to build as quickly as we could print the bricks. Around 200 every 10 minutes. With a head start though, we could cope with that.
The next problem was what are we going to print? Talking with our customer it was agreed that every individual brick could have a different print. Because we wanted to keep the prints to the same size - and we were using 1x1 bricks - we would have to limit that to 6 characters. Even printing 6 characters in 6mm would be hard!
Although our printer can do what’s called ‘variable printing’, this project would be well beyond that! We asked the printer manufacturer who said they’d never been asked to do something on this scale. Cue the mail-merge from hell! Many spreadsheets and some of the most exacting layouts we’ve ever made (remember we have less than 1mm tolerance) .
Finally, all we had to do was decide how to create the prints so that they wouldn’t detract from the finished look of the model. We developed a way to emboss the bricks with only a varnished ink. It’s hard to see in photographs but looks great in real life!
Oh, and assemble the bricks into slabs for printing. About 160 hours work there alone…
Build time!
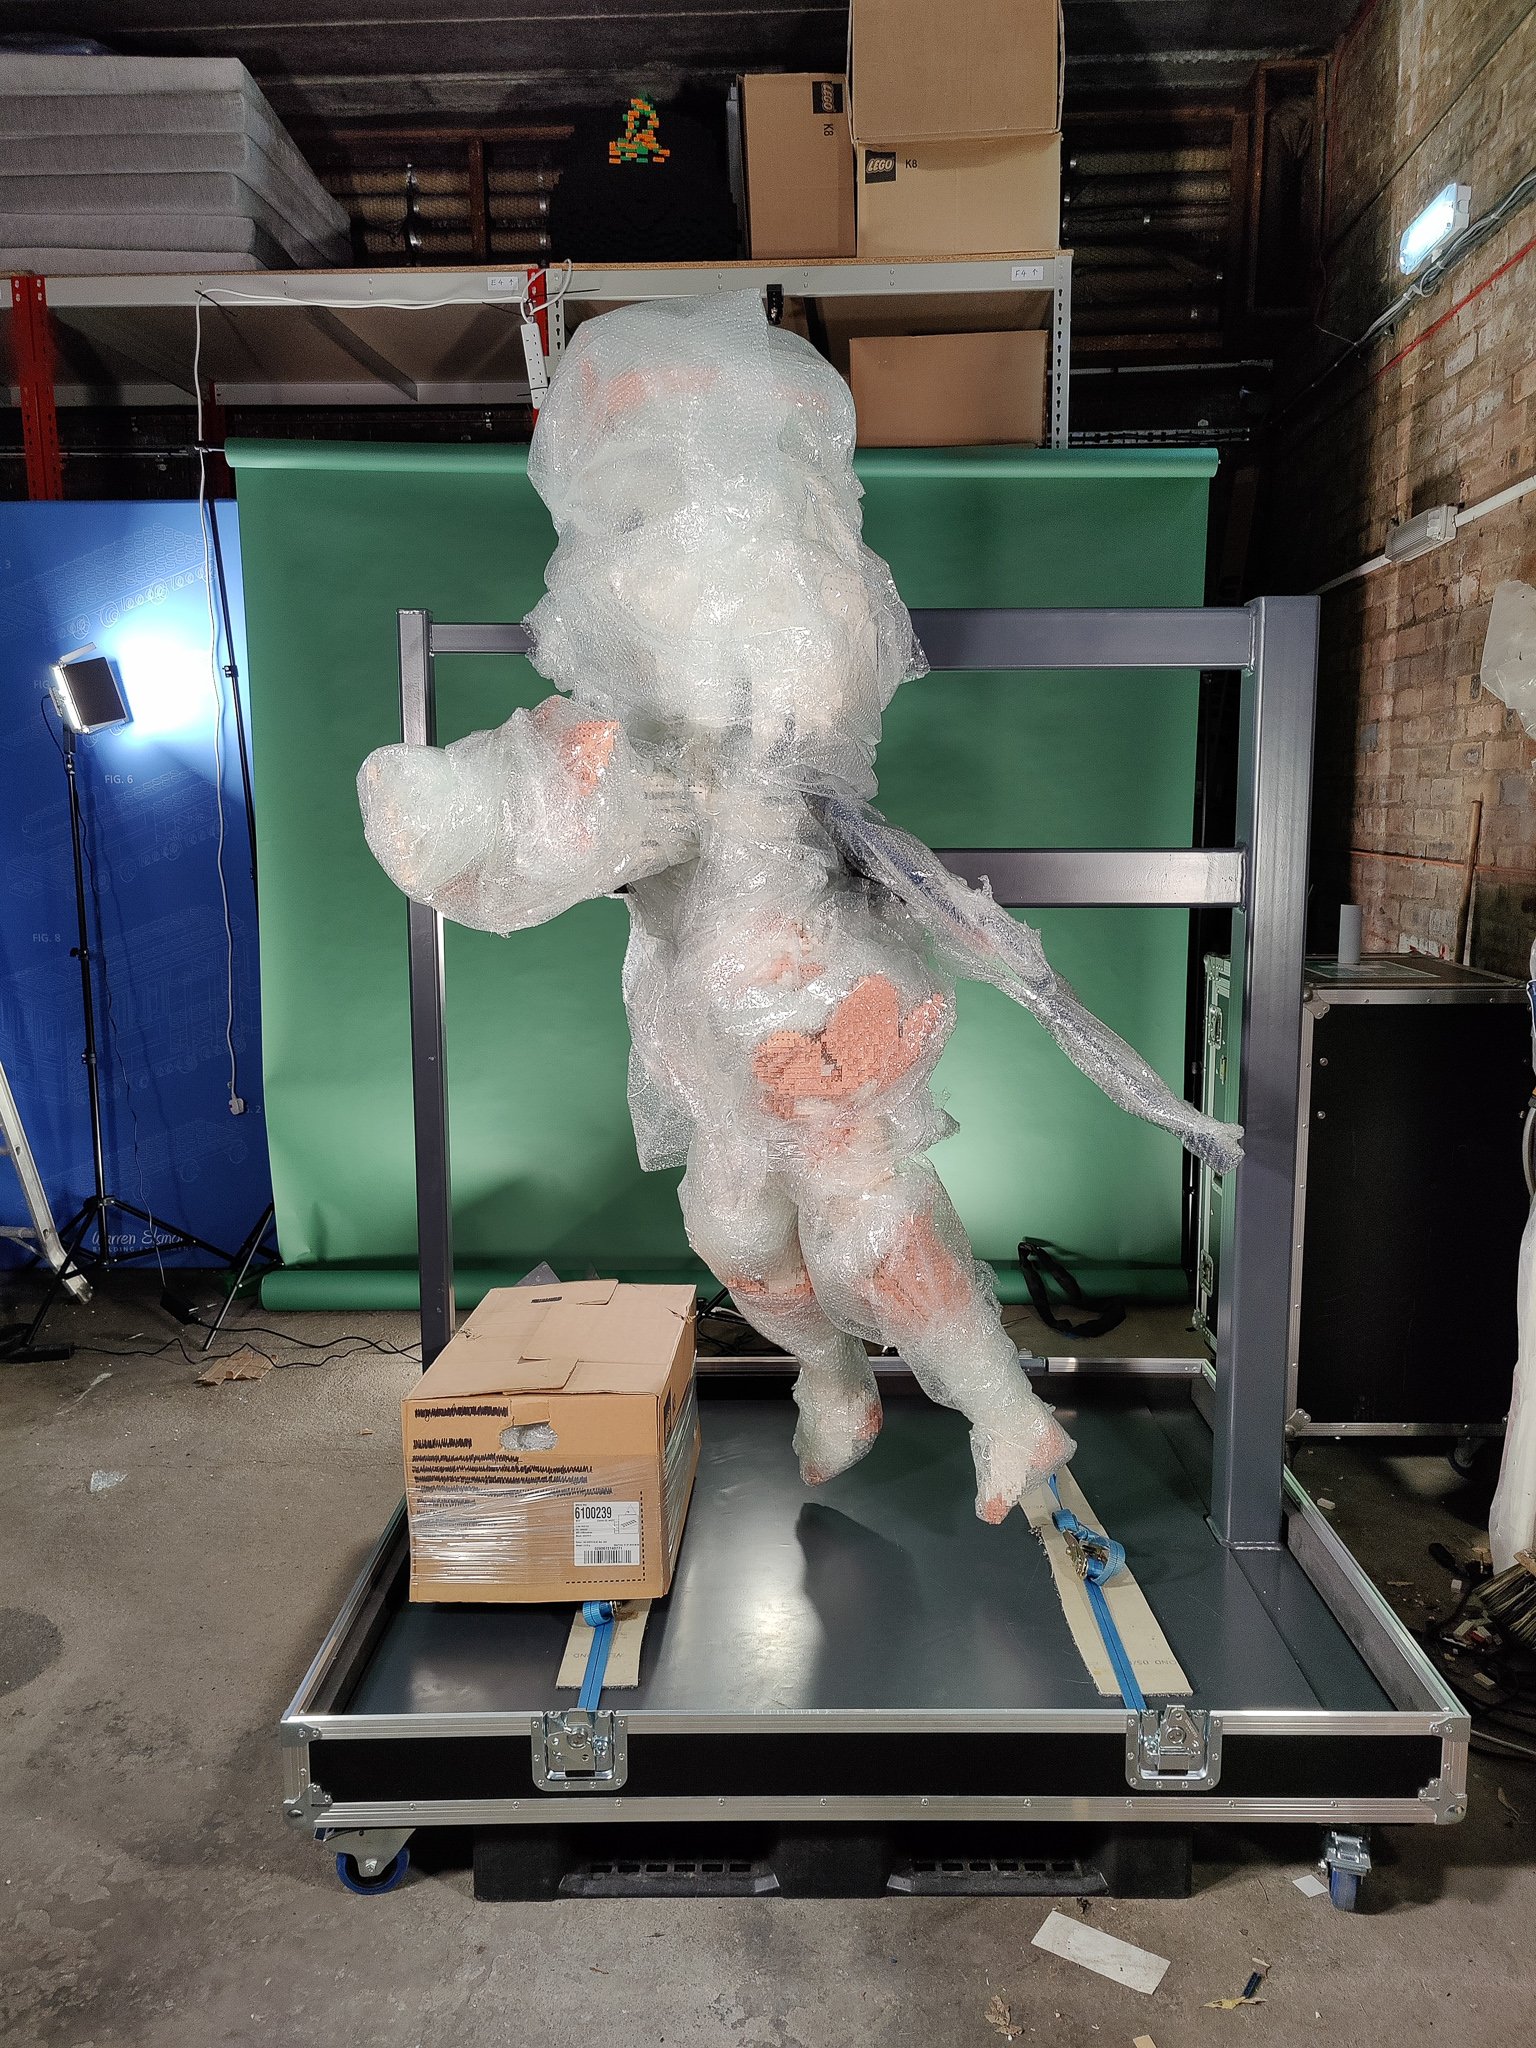
Did that seem like a lot of work before we put the first bricks together? I can assure you it felt the same way for us! This is usual in the way we work though. The bricks don’t get stuck together until we know what the final model will look exactly right. Needless to say though, we were keen to get started!
With everything ready, Kirsten and I could start work on the real build. It may seem strange not to see a whole crew of people building the model but some real-world limitations come into play. Firstly - there’s only so much physical space to work in. The model is huge but the body parts aren’t. Two people work well with 2 legs, 2 hands etc. Secondly, we couldn’t build the model without the printed bricks - so Denise spent 4 weeks nursing a printer and supplying us with the right bricks at the same time. Finally, there were some parts we could build ‘on the bench’, so Adam joined us for a few weeks working in the studio on those parts.
The final model was built over a period of just over 3 weeks. There is a limit to just how quickly you can build a brick model - not just in terms of physical effort, but a model built too quickly can start to distort under its own weight. Although this model was large, some of the parts such as the wrists had very little clearance. So, slow and steady was the aim for those parts. You certainly don’t want to have to rip apart the model to fix mistakes!

Building a model that can ‘fly’ also poses some particular challenges. Firstly, it has to be very robust. It also has to allow for connections straight onto the steel framework, to take up the load. When you’re building a model that also has to look right when they’re on the ground - you need to create access panels that can be easily added or removed. So, as we progressed we had to make sure we made these parts removable and replaceable.
The very last part to add was actually the first part of the model we built - the floating crown. Obviously toy bricks don’t really float - so instead we installed 3 short acrylic rods into her head to fix the crown in place. Finished, apart from packing her up into her case and getting her ready for delivery!
Delivery and Launch
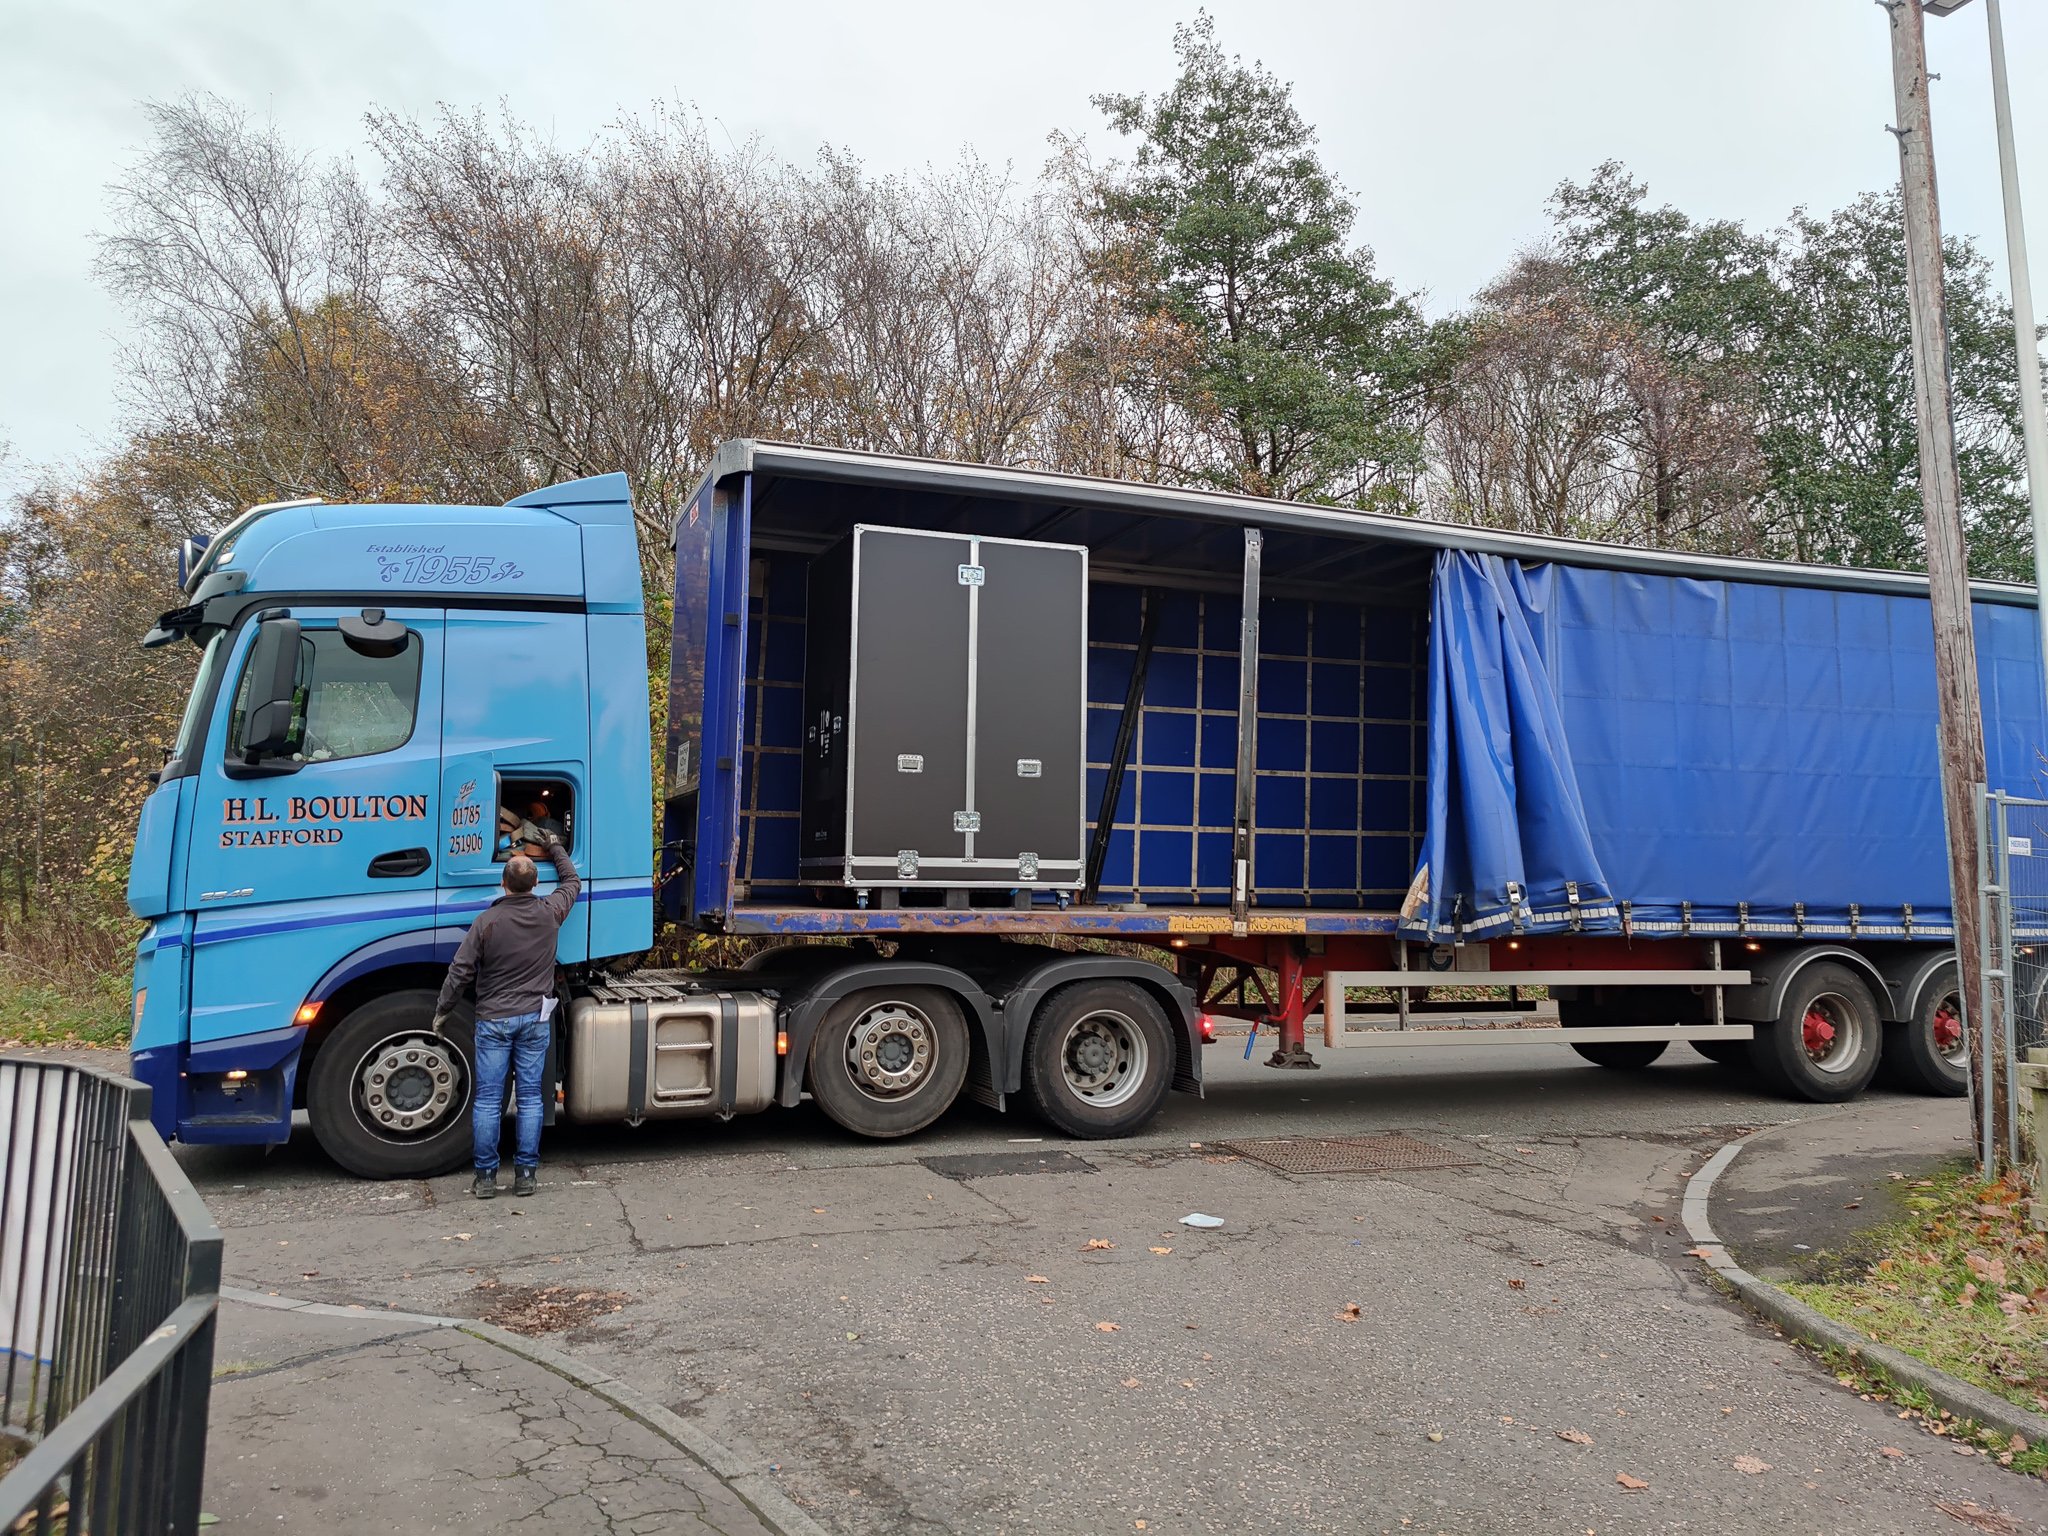
Paimon, in her flight case and on her way to London
With the model complete, all that was left was to get it to Korea - quickly so it could be ready for a launch event. Transporting a 410Kg model to Korea quickly - that is over 2 metres tall and cannot be tipped over - isn’t quite as simple as filling in a form on the web!
In fact, delivery of the model was something that we’d be thinking about right at the beginning. There was always a question of ‘how big is big?’. You might remember that we’ve built bigger models, but of course there is no point in building a model if it’s stuck in our studio! A key requirement of this model was that it needed to be transported in one piece. The customer didn’t want to have to match sections together when it was on display. It would also have to be air freighted as there wouldn’t be time to send it by sea.
So, just how large can a model be and fit in a plane? The answer, it turns out, is ‘it depends on the plane’. Although the idea of chartering an Antonov freighter* to move the model was interesting, we decided on a more reasonable 747 Jumbo Freighter. The model would be too tall to fit into the belly of a passenger plane, but with its opening nose it would fit into a 747. We chartered a lorry to take it from Edinburgh to London (the nearest airport that 747 freighters fly to), then onto Korea.
*The only airplanes capable of transporting 3 metre tall items - which was the original plan for the model! Yes, the question really did come up - but it was going to be well over budget!
All that was left then was to install the model in Korea and announce it to the public. As we built the model, we’d created a manual that could be followed as, due to COVID regulations, traveling to assist with the install wasn’t going to be possible. Thankfully, the first thing that we had back from our client was a picture of her fully installed and looking great!

The final launch - as part of Genshin Impacts 2.4 launch
Wrap Up
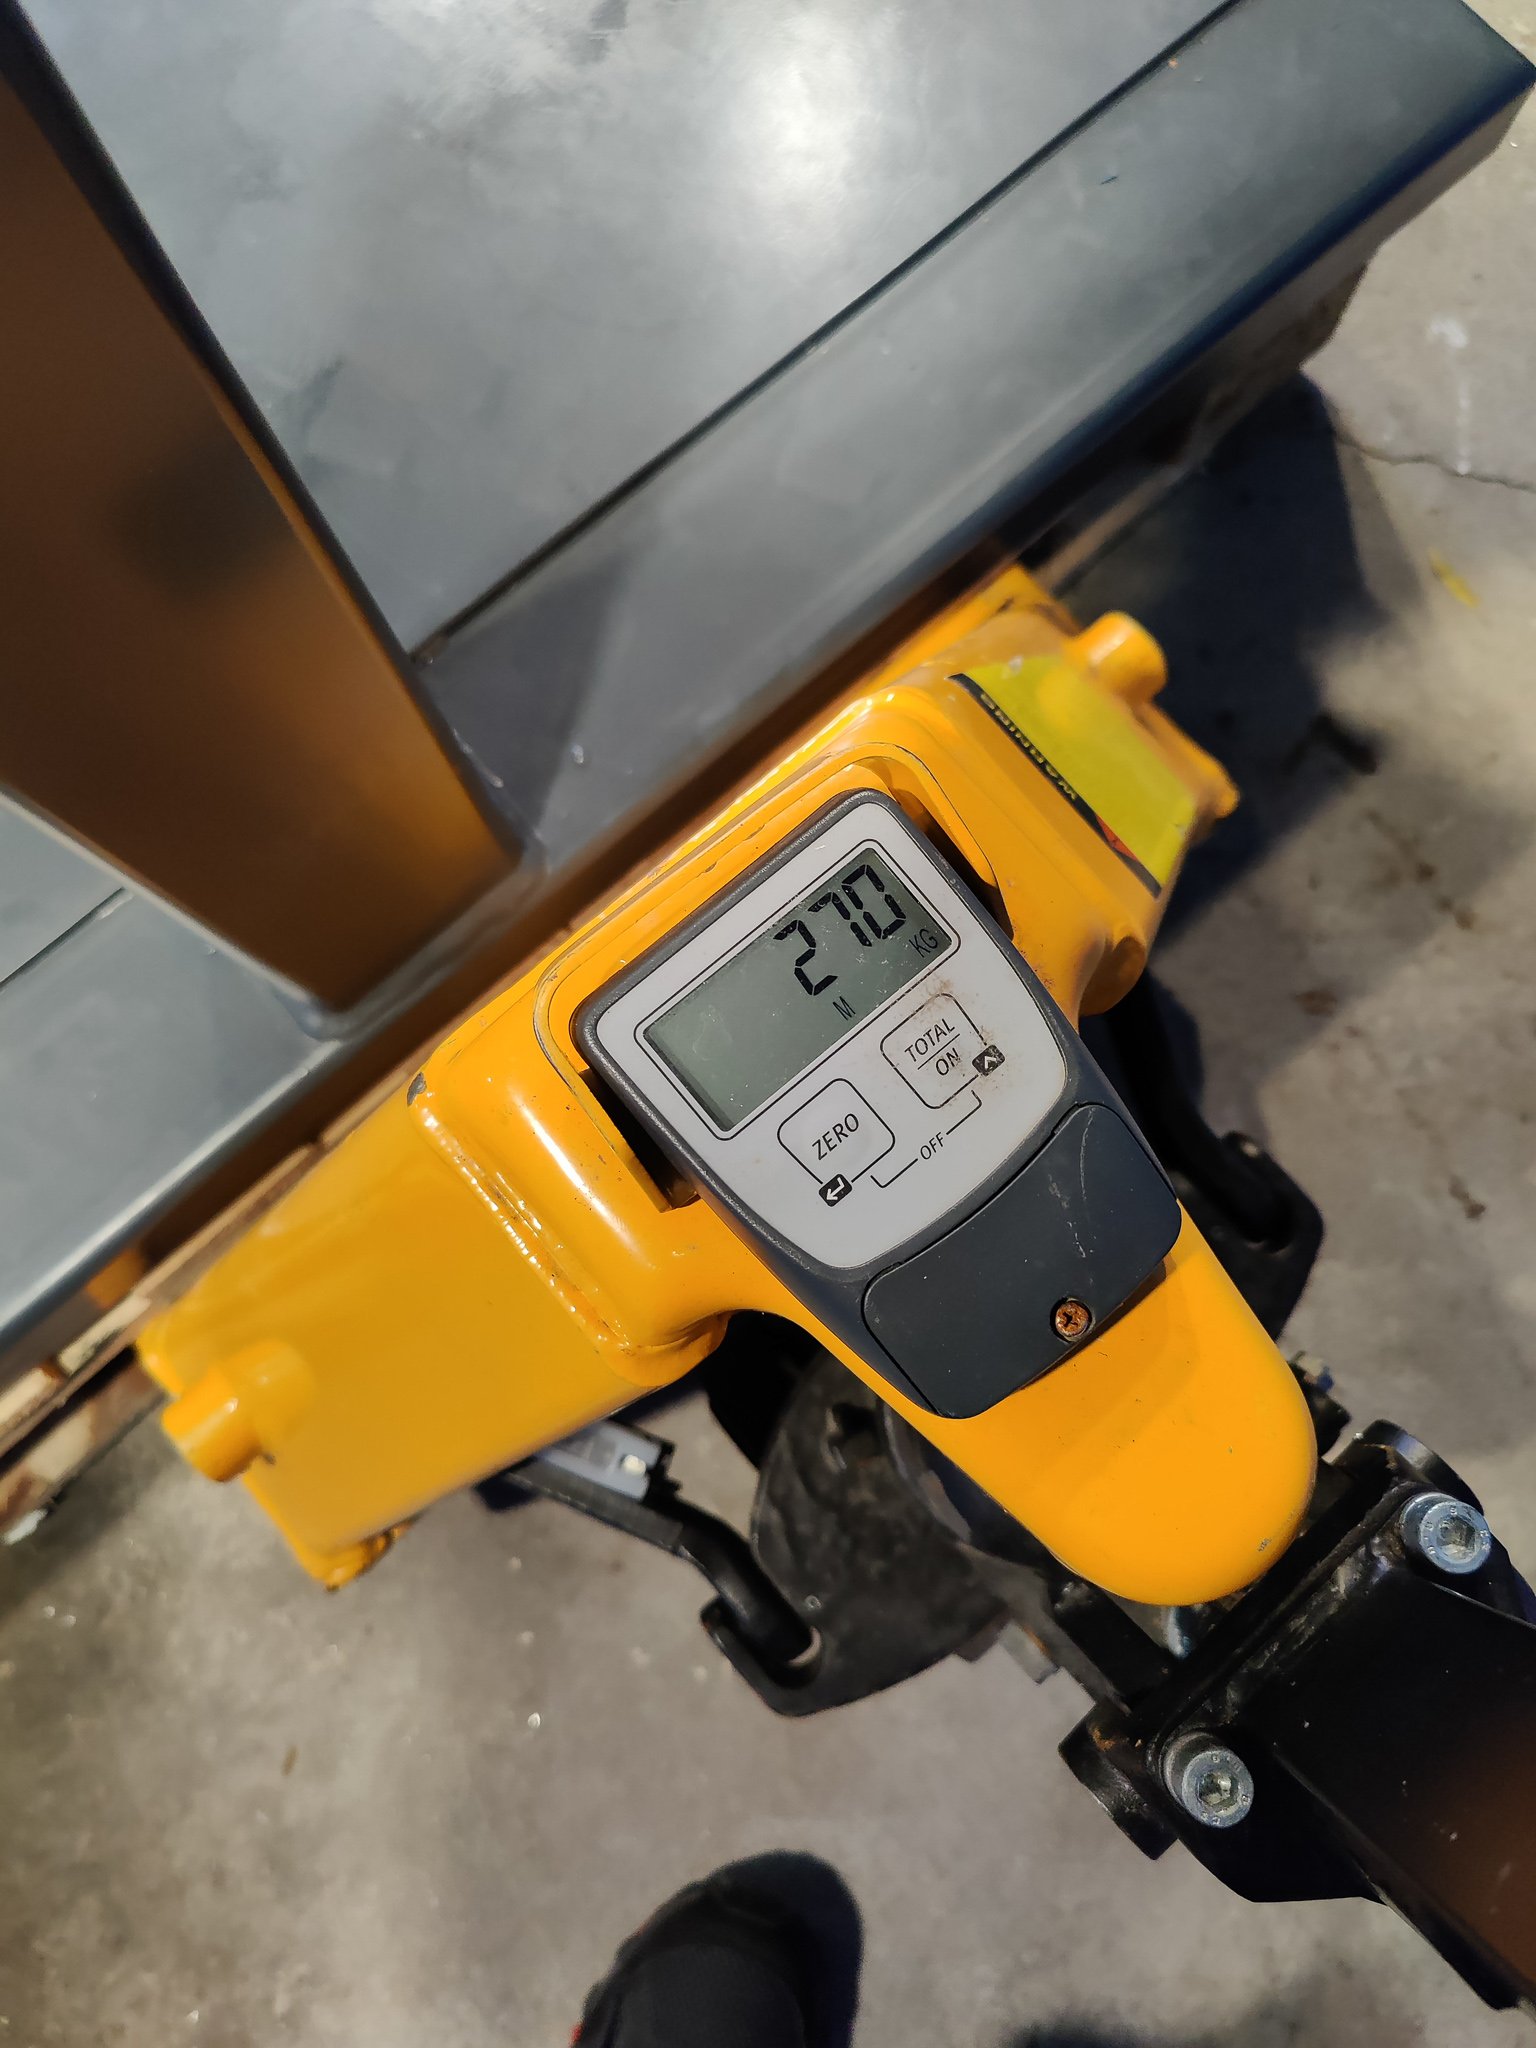
The final recipe? To create a 410Kg finished model to ship, all you need is;
550 hours of work
A 210Kg steel framework
500Kg of custom toy bricks, plus
50Kg of LEGO bricks
1 very - VERY - large flightcase
All the tools needed for installation
1 37-page installation manual
7 removable panels for installation
2 iMacs, loaded with our special design software
1 Macbook, only used for controlling;
5 cameras, including a 360 camera for those awkward shots (one of our DSLR’s even gave its life for this project - the shutter died on the final day!)
10 studio lights
1 direct substrate printer
A variety of drills, saws, sanders, thread tappers, etc, etc, etc….
4 members of staff working continuously on this
1 pallet truck
1 cherry picker
1 chain hoist
1 forklift
1 articulated lorry
1 Jumbo Jet freighter
and a box of spare parts. Just in case!
Now, what does 2022 hold…..?